> ## Documentation Index
> Fetch the complete documentation index at: https://domoinc-openapi-sync-dataflows.mintlify.site/llms.txt
> Use this file to discover all available pages before exploring further.

# DomoのMySQL（ベータ版 - 推奨）

## はじめに

MySQLユーザーは、Cloud Integrationsのネイティブ統合を通じて、自分のデータをDomoに接続できます。接続パラメーターを指定し、Domo DataSetとして表示するテーブルを選択します。

この記事の手順に従って、Cloud Integrationsを使用して読み取り専用のMySQL-Domo接続を設定します。

## MySQLへの読み取り専用接続を設定する

1. Domo Data Centerに移動します。

2. （条件付き）Data Warehouseページが表示されない場合は、サイドバーを使用して <img src="https://mintcdn.com/domoinc-openapi-sync-dataflows/a4f3szIEyPCXGEyk/images/kb/ka0Vq000000BCNd-00N5w00000Ri7BU-0EMVq000000uR3y.jpg?fit=max&auto=format&n=a4f3szIEyPCXGEyk&q=85&s=2a400452273b9375fbdb961008ae7c92" style={{width: 20, height: 20, display: 'inline', verticalAlign: 'start', margin: '0'}} width="48" height="48" data-path="images/kb/ka0Vq000000BCNd-00N5w00000Ri7BU-0EMVq000000uR3y.jpg" /> **［Data Warehouse］** に進みます。

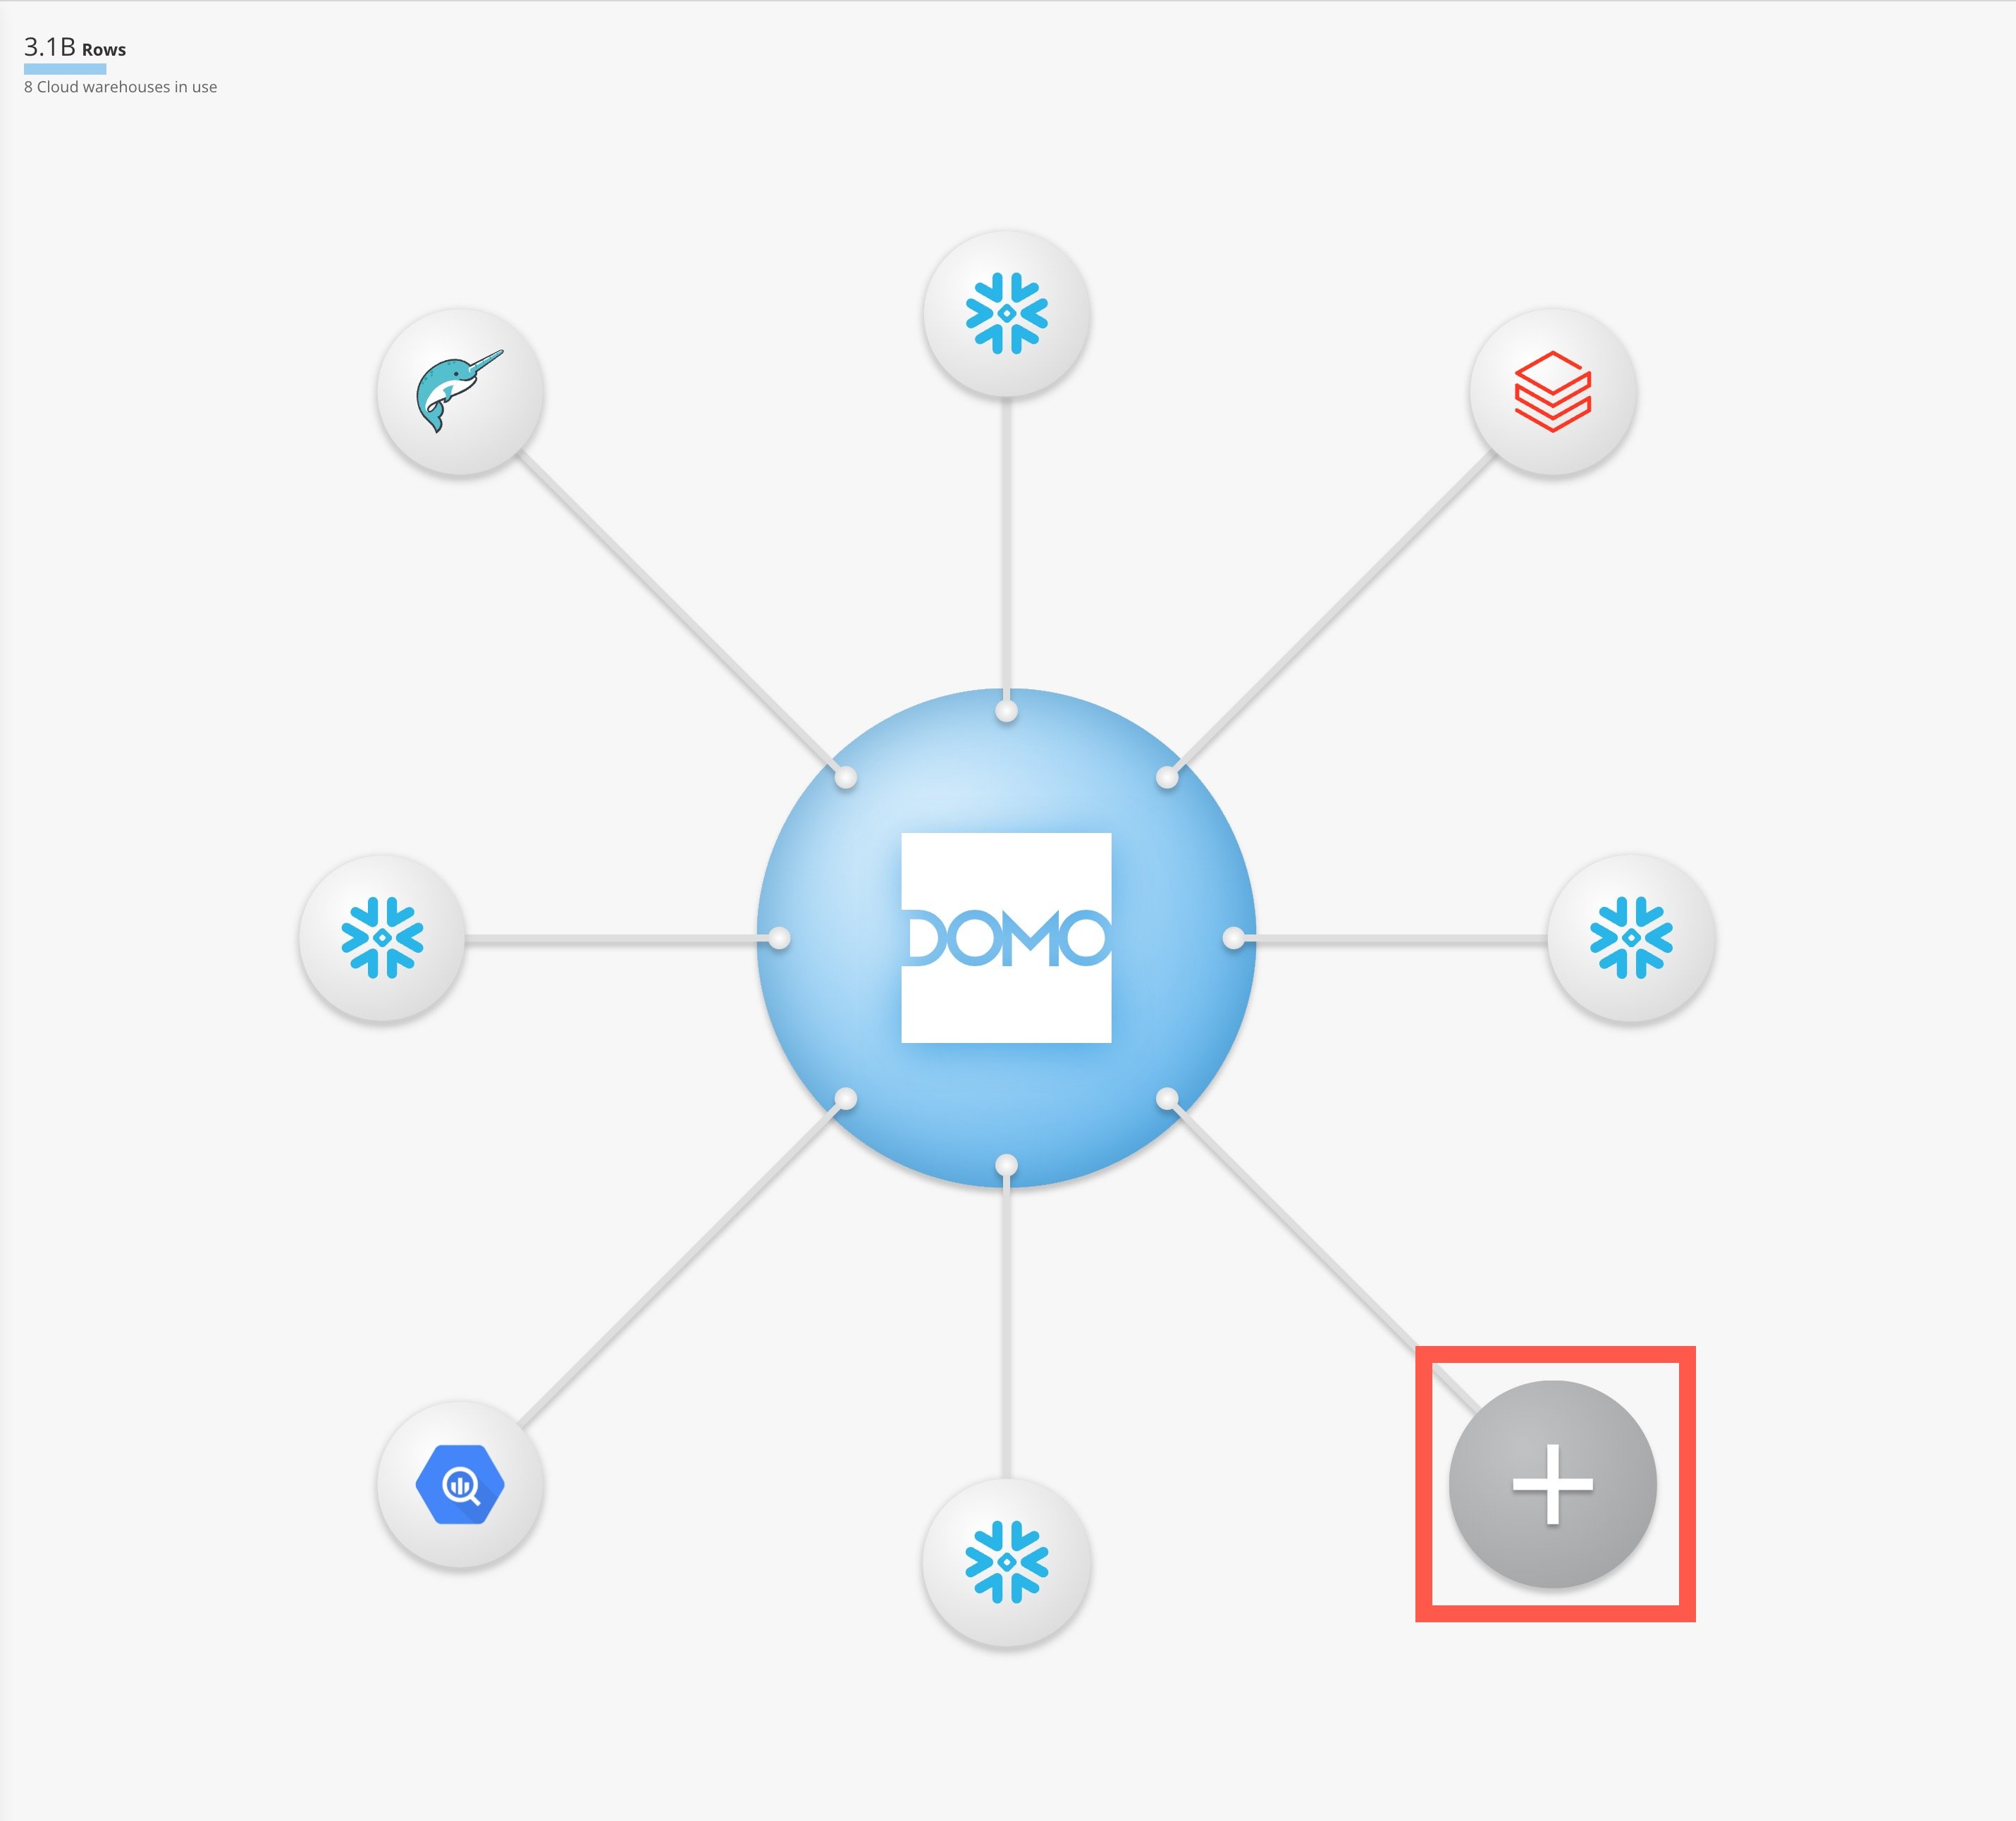
3. <img src="https://mintcdn.com/domoinc-openapi-sync-dataflows/a4f3szIEyPCXGEyk/images/kb/ka0Vq000000BCNd-00N5w00000Ri7BU-0EMVq000000uSeO.jpg?fit=max&auto=format&n=a4f3szIEyPCXGEyk&q=85&s=f4e148e9dcb761c9dc6a5b55c4f4de9d" style={{width: 20, height: 20, display: 'inline', verticalAlign: 'start', margin: '0'}} width="226" height="224" data-path="images/kb/ka0Vq000000BCNd-00N5w00000Ri7BU-0EMVq000000uSeO.jpg" /> **［新しいクラウドアカウントを追加］** を選択します。

   <Frame>
     <img alt="add new cloud account.jpg" src="https://mintcdn.com/domoinc-openapi-sync-dataflows/a4f3szIEyPCXGEyk/images/kb/ka0Vq000000BCNd-00N5w00000Ri7BU-0EMVq000000uRaE.jpg?fit=max&auto=format&n=a4f3szIEyPCXGEyk&q=85&s=390abf22c7c1cc8086916df164d4fe6e" width="2860" height="2584" data-path="images/kb/ka0Vq000000BCNd-00N5w00000Ri7BU-0EMVq000000uRaE.jpg" />
   </Frame>

   **［既存のクラウドウェアハウスを拡大する］** モーダルが表示されます。

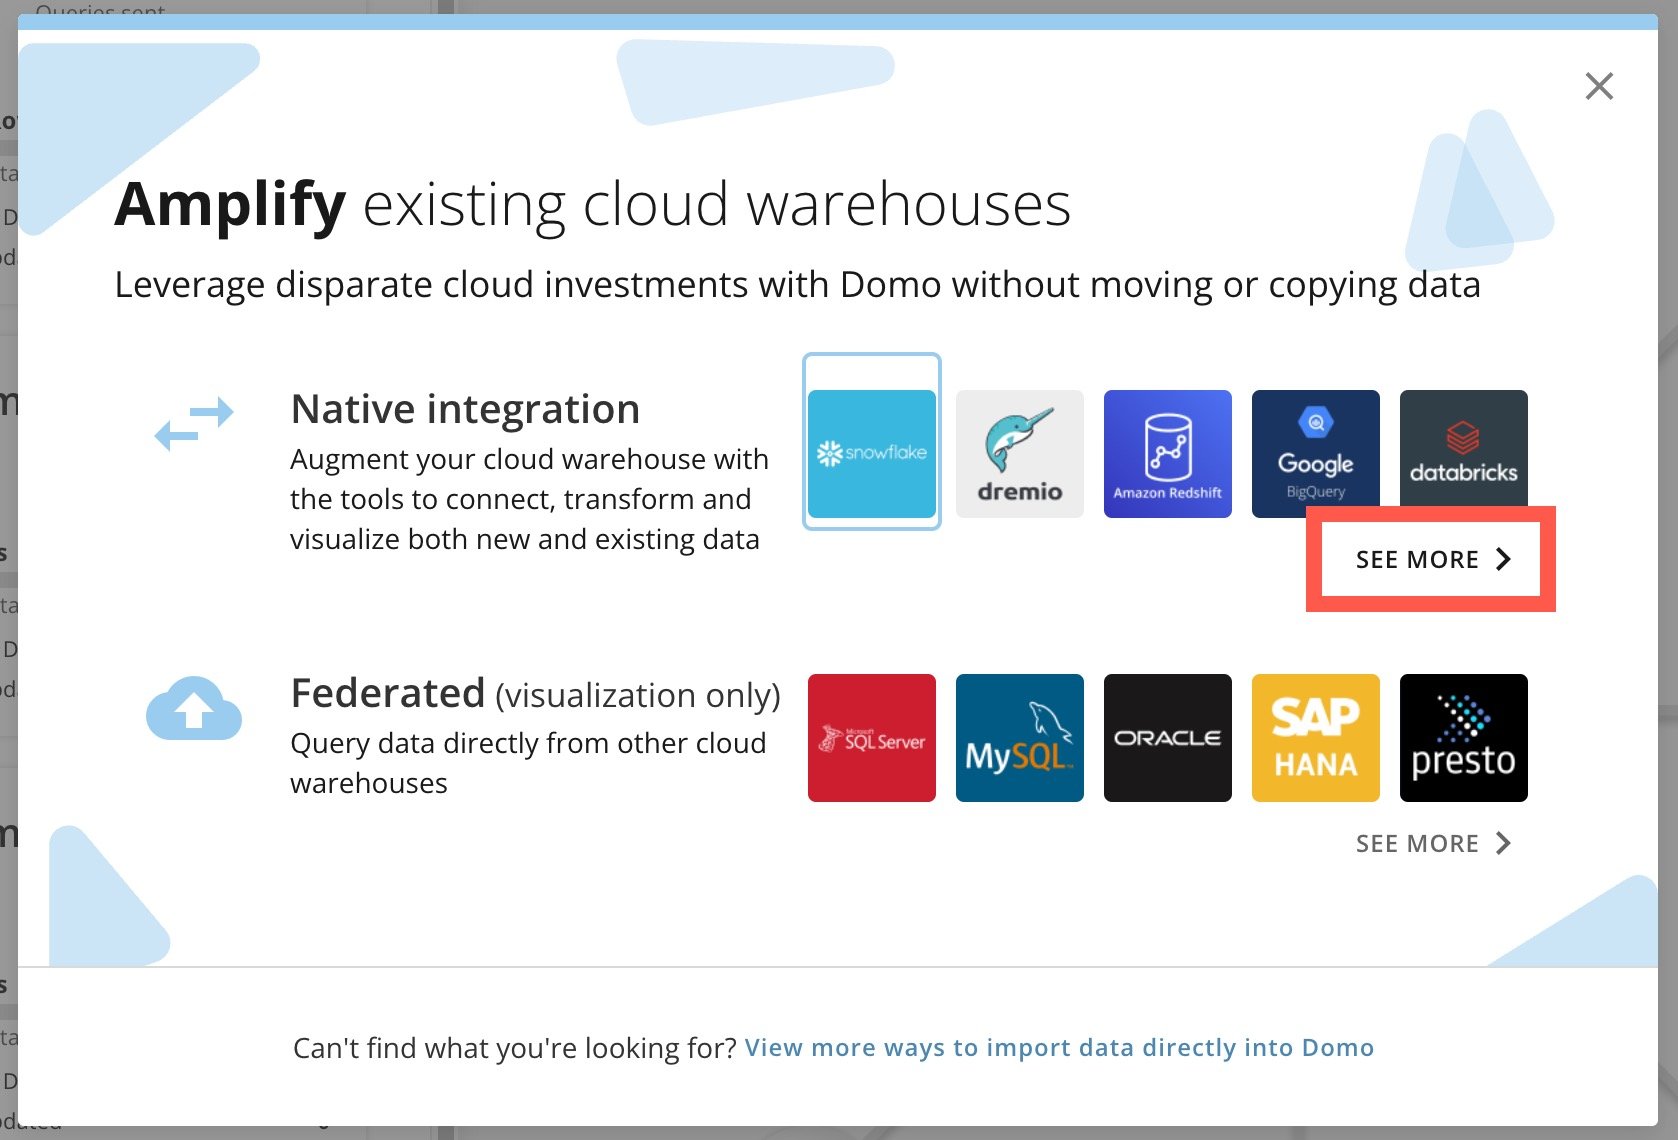
4. **［ネイティブ統合］** セクションの **［詳細を見る］** を選択して、残りのオプションを表示します。

   <Frame>
     <img alt="see more.jpg" src="https://mintcdn.com/domoinc-openapi-sync-dataflows/a4f3szIEyPCXGEyk/images/kb/ka0Vq000000BCNd-00N5w00000Ri7BU-0EMVq000000uTIf.jpg?fit=max&auto=format&n=a4f3szIEyPCXGEyk&q=85&s=6094ef4540f7ea4d381ea899eab2f9dc" width="1678" height="1140" data-path="images/kb/ka0Vq000000BCNd-00N5w00000Ri7BU-0EMVq000000uTIf.jpg" />
   </Frame>

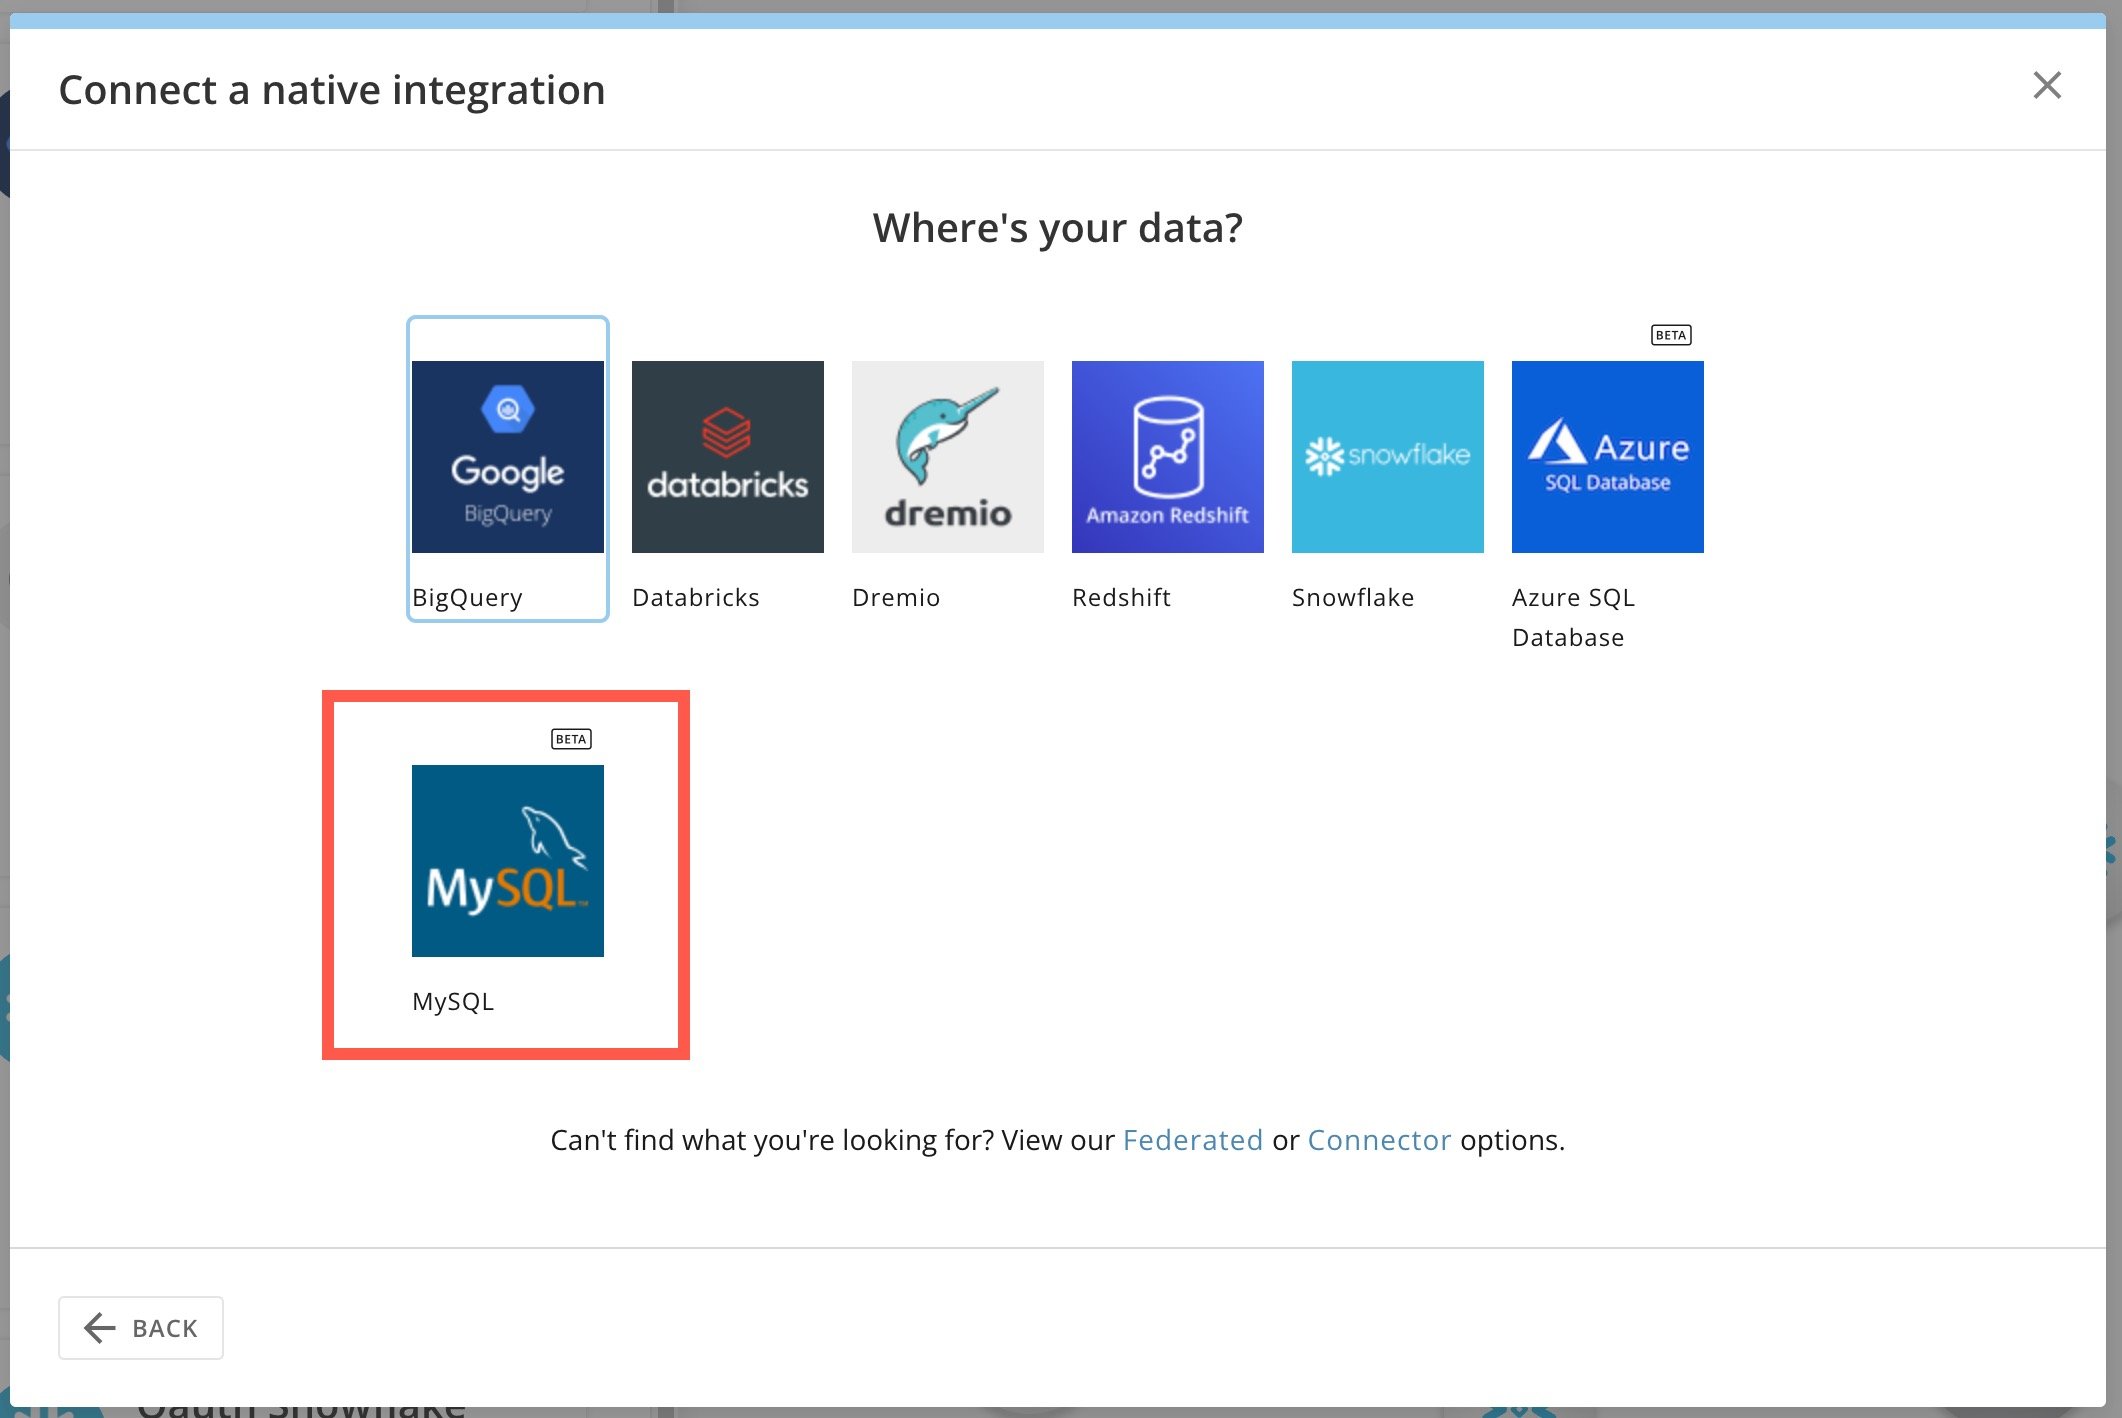
5. **［MySQL］** を選択します。

   <Frame>
     <img alt="mysql.jpg" src="https://mintcdn.com/domoinc-openapi-sync-dataflows/EpEQaVXeYQJOgZLs/images/kb/ka0Vq000000CwrR-00N5w00000Ri7BU-0EMVq000000uRYc.jpg?fit=max&auto=format&n=EpEQaVXeYQJOgZLs&q=85&s=b7a1c8550a2d33da91bc71eec6976bb2" width="2122" height="1418" data-path="images/kb/ka0Vq000000CwrR-00N5w00000Ri7BU-0EMVq000000uRYc.jpg" />
   </Frame>

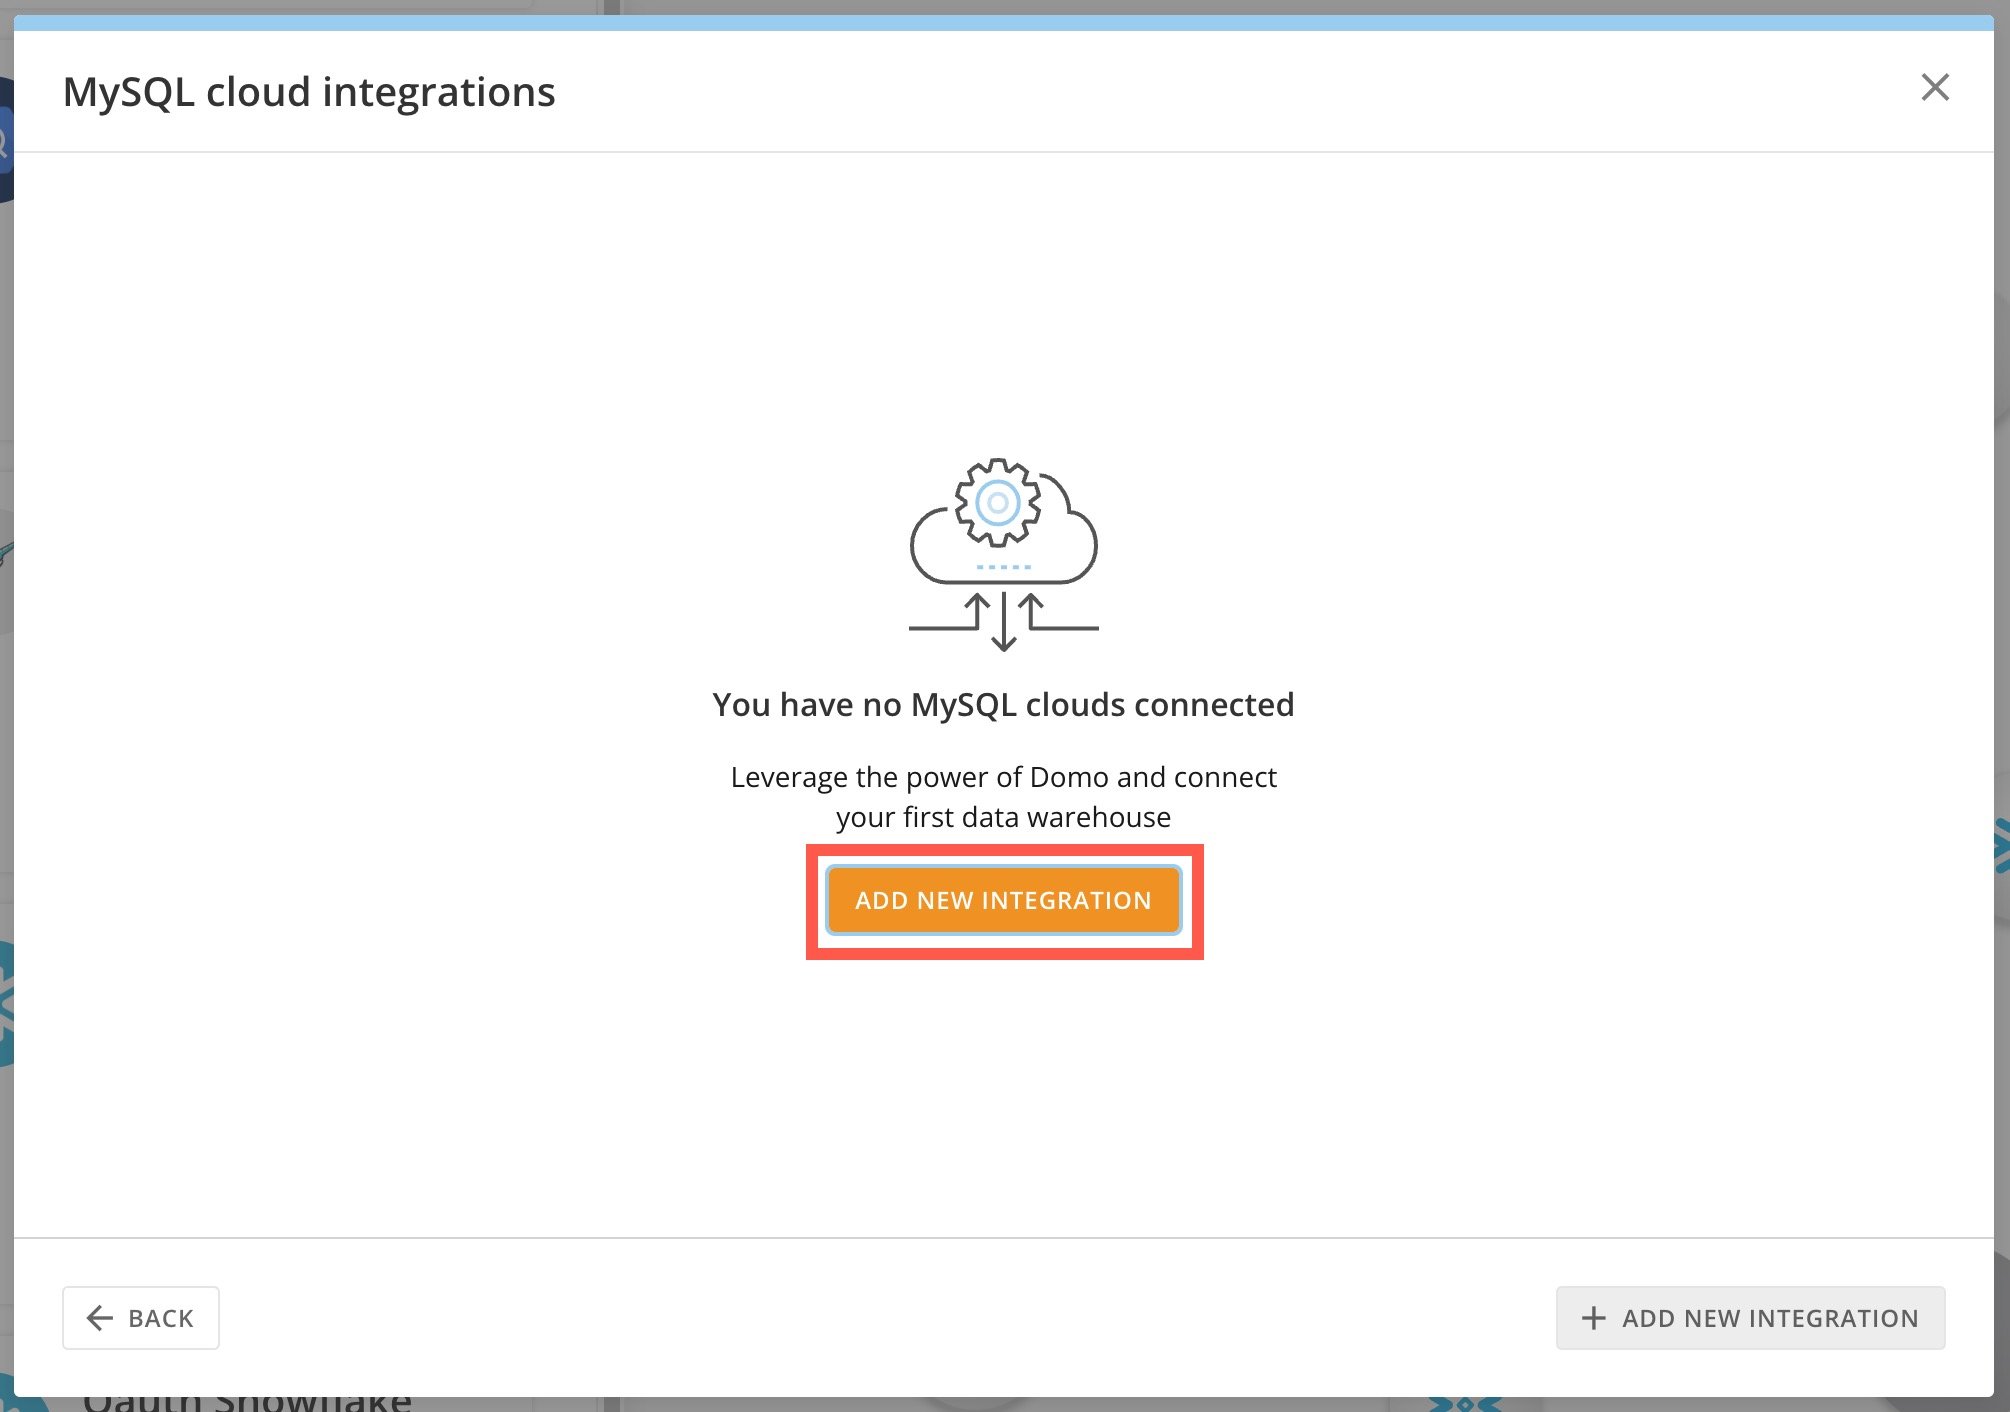
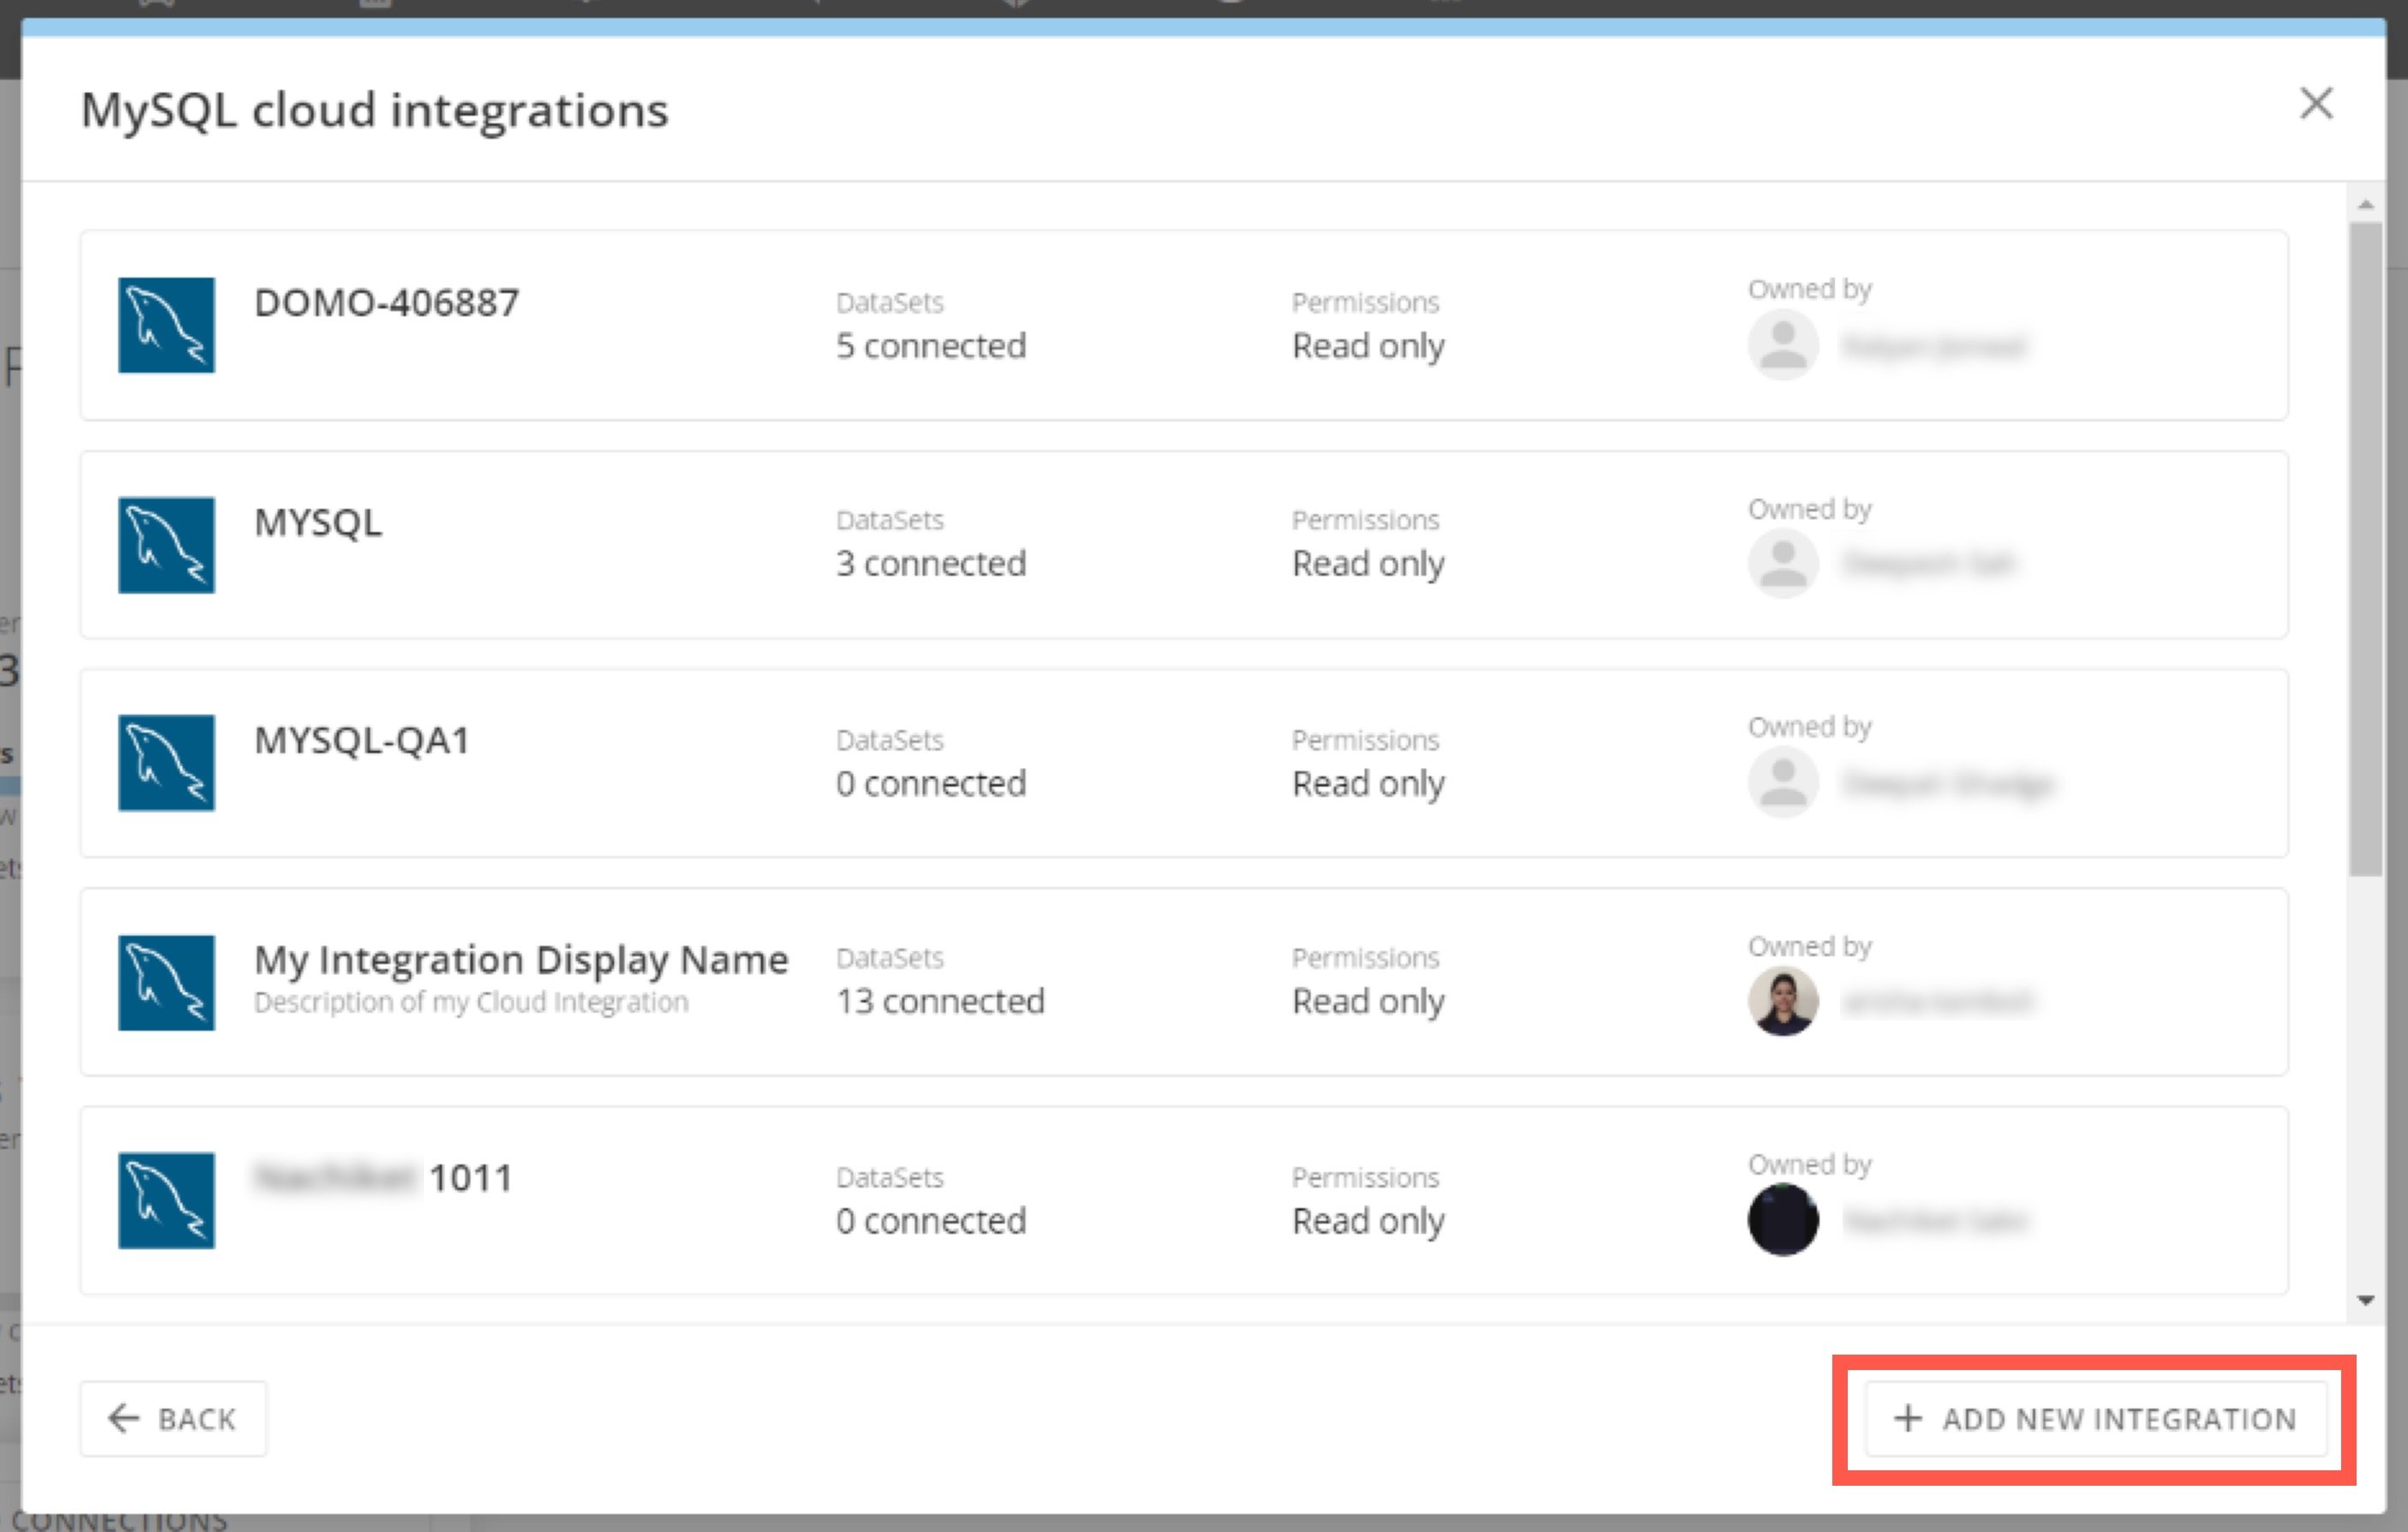
6. **［+新しい統合を追加］** を選択します。

   <img src="https://mintcdn.com/domoinc-openapi-sync-dataflows/EpEQaVXeYQJOgZLs/images/kb/ka0Vq000000CwrR-00N5w00000Ri7BU-0EMVq000000uSL0.jpg?fit=max&auto=format&n=EpEQaVXeYQJOgZLs&q=85&s=c92f8f42f2146acdb24017799d98640d" style={{width: 20, height: 20, display: 'inline', verticalAlign: 'start', margin: '0'}} width="2010" height="1412" data-path="images/kb/ka0Vq000000CwrR-00N5w00000Ri7BU-0EMVq000000uSL0.jpg" />

   <img src="https://mintcdn.com/domoinc-openapi-sync-dataflows/EpEQaVXeYQJOgZLs/images/kb/ka0Vq000000CwrR-00N5w00000Ri7BU-0EMVq000000uTgr.jpg?fit=max&auto=format&n=EpEQaVXeYQJOgZLs&q=85&s=3e44a86a97cee498b5b2dfe260d47443" style={{width: 20, height: 20, display: 'inline', verticalAlign: 'start', margin: '0'}} width="2811" height="1788" data-path="images/kb/ka0Vq000000CwrR-00N5w00000Ri7BU-0EMVq000000uTgr.jpg" />

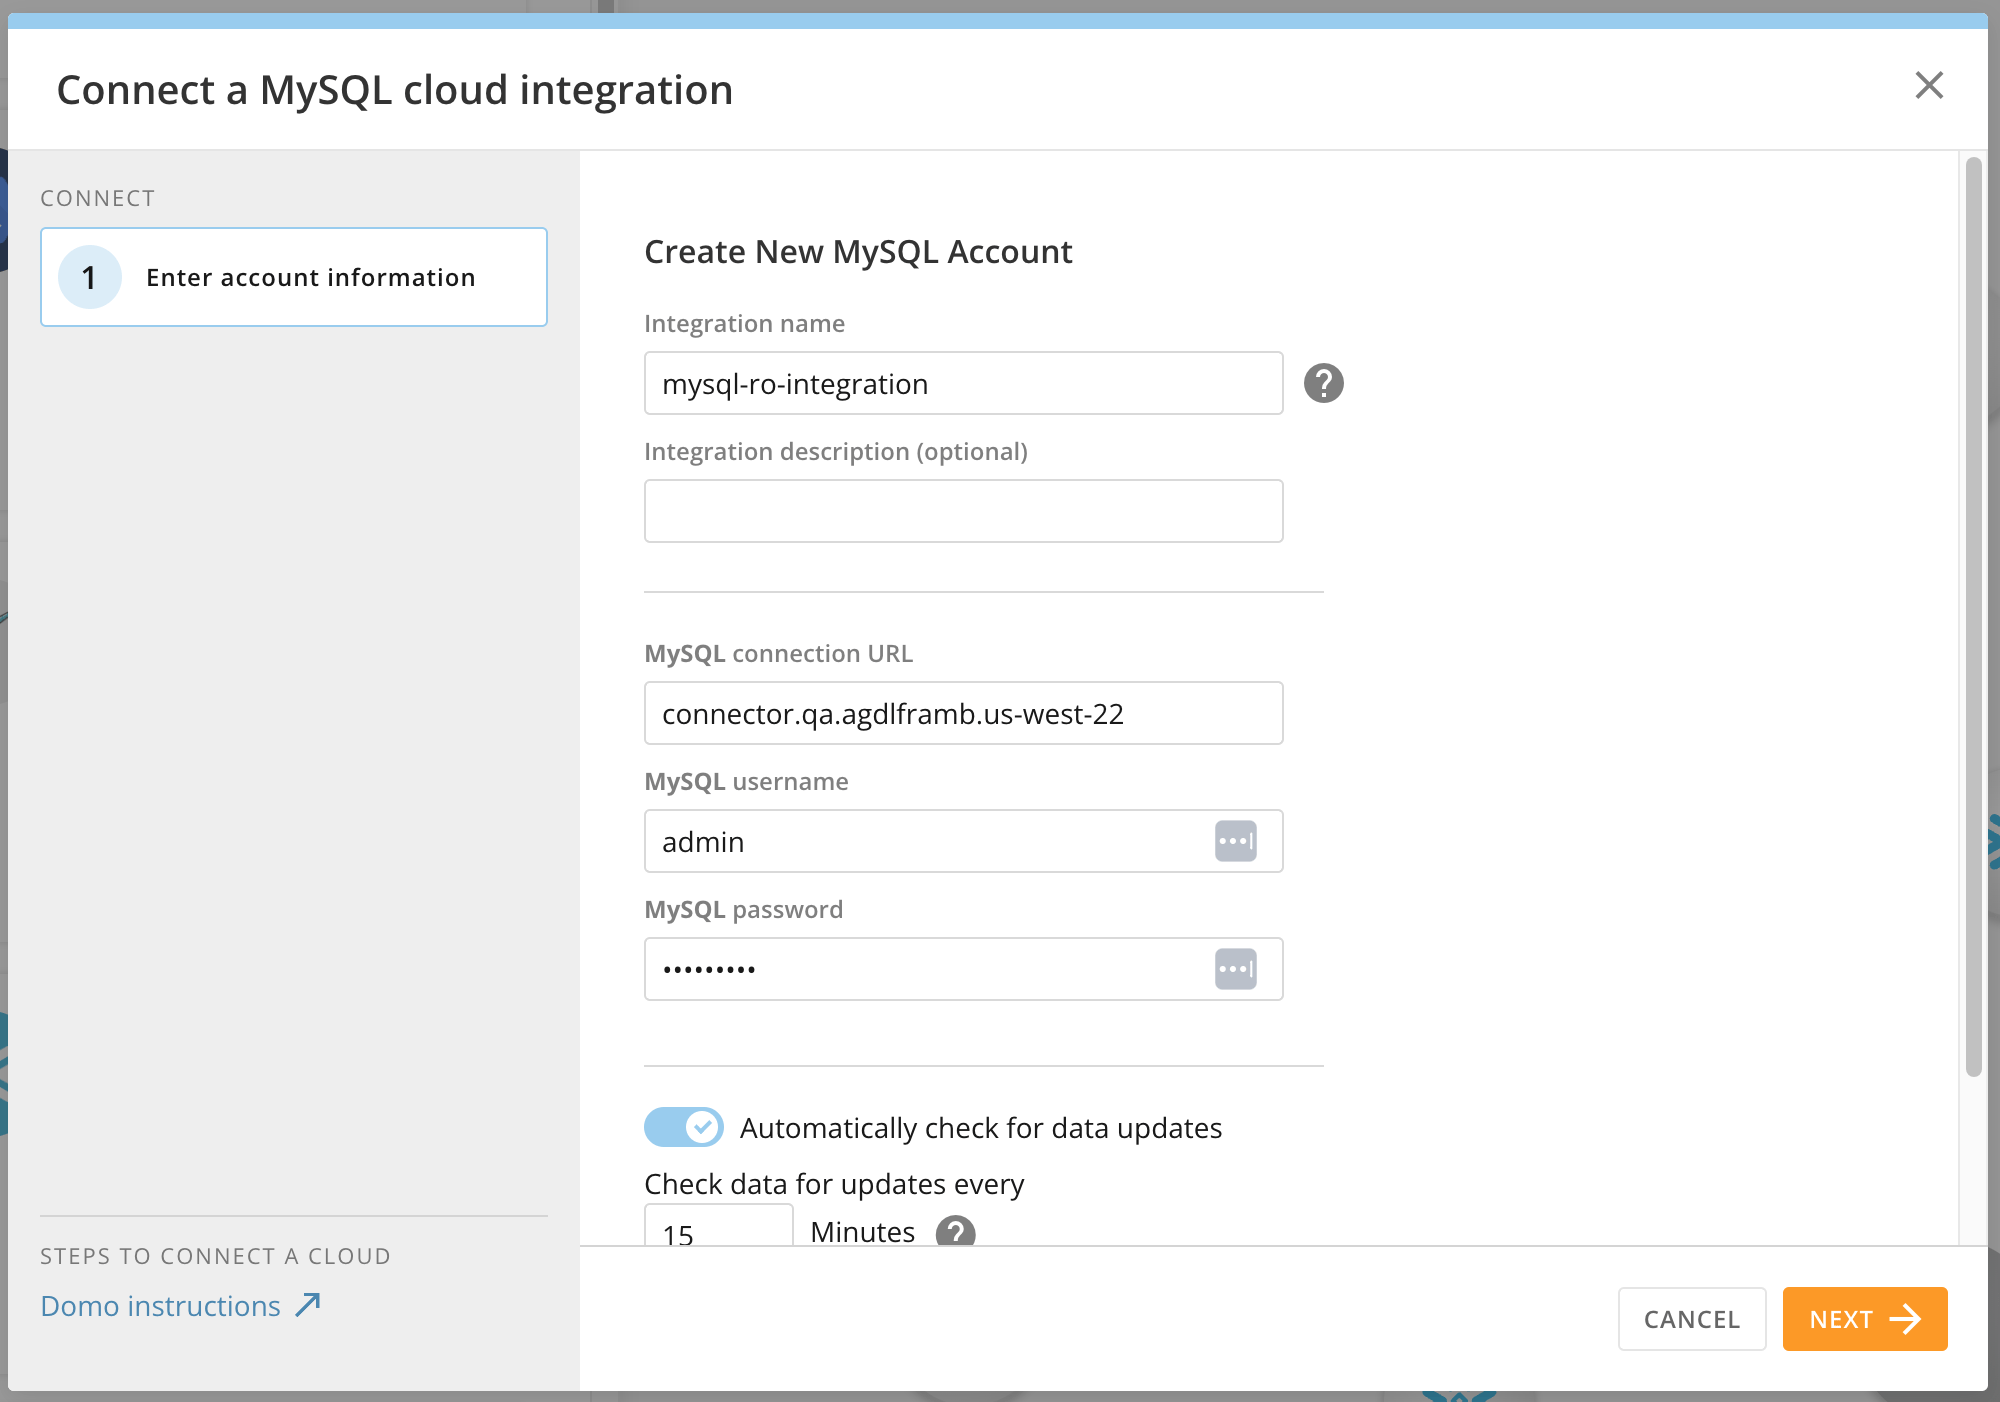
7. 以下の接続パラメーターを適切なフィールドに入力します。
   * **［統合名］ —** 将来統合を更新する必要が出てきた場合に、統合のリストで検索する名前です。
   * **［統合の説明（オプション）］ —** 統合に関する追加情報を入力します。
   * **［MySQL接続URL］ —** 接続先のMySQLインスタンスを表すホストとポートを入力します。例： *[myhost.com](http://myhost.com):3306*
   * **［MySQLユーザー名］ —** 接続先のデータにアクセスできるMySQLインスタンスのユーザー名。
   * **［MySQLパスワード］ —** MySQLユーザーのパスワード。

     <Frame>
       <img alt="Screenshot 2024-05-07 at 3.21.47 PM.png" src="https://mintcdn.com/domoinc-openapi-sync-dataflows/EpEQaVXeYQJOgZLs/images/kb/ka0Vq000000CwrR-00N5w00000Ri7BU-0EMVq000000uWej.jpg?fit=max&auto=format&n=EpEQaVXeYQJOgZLs&q=85&s=ed453ac2c456d532da7aa203a008e74f" width="2000" height="1402" data-path="images/kb/ka0Vq000000CwrR-00N5w00000Ri7BU-0EMVq000000uWej.jpg" />
     </Frame>

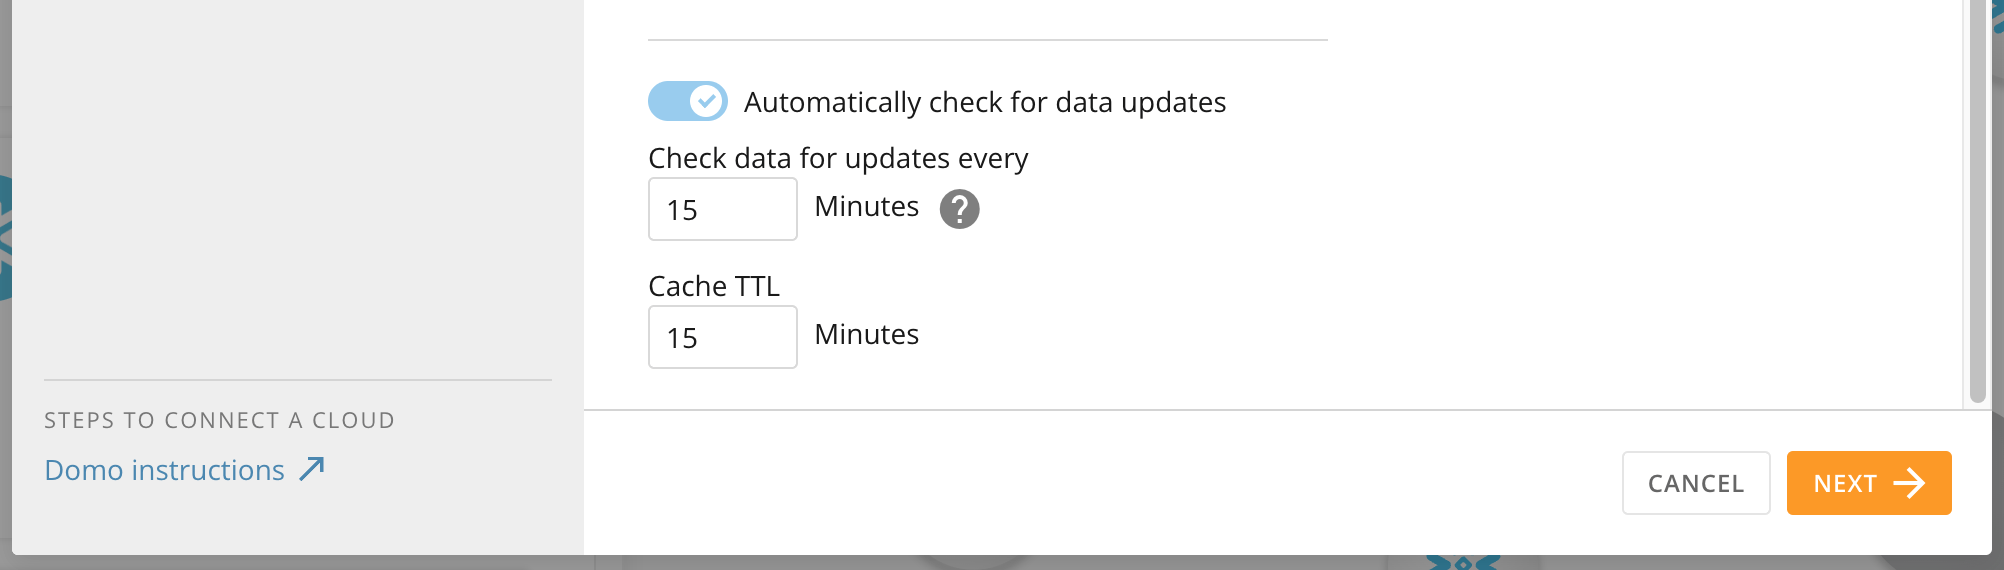
8. キャッシュオプションを設定します。データの更新を自動的にチェックするかどうかやどの間隔でチェックするかを選択できます。Cloud Integrationsのキャッシュのルールについては、[こちら](/ja/s/article/4412849158167) を参照してください。
   <Frame>
     <img alt="Screenshot 2024-05-07 at 3.24.52 PM.png" src="https://mintcdn.com/domoinc-openapi-sync-dataflows/a4f3szIEyPCXGEyk/images/kb/ka0Vq000000BCNd-00N5w00000Ri7BU-0EMVq000000uWur.jpg?fit=max&auto=format&n=a4f3szIEyPCXGEyk&q=85&s=9e8dfdee34acb460cc1ed0b210c28551" width="2004" height="570" data-path="images/kb/ka0Vq000000BCNd-00N5w00000Ri7BU-0EMVq000000uWur.jpg" />
   </Frame>

9. **［次へ］** を選択します。

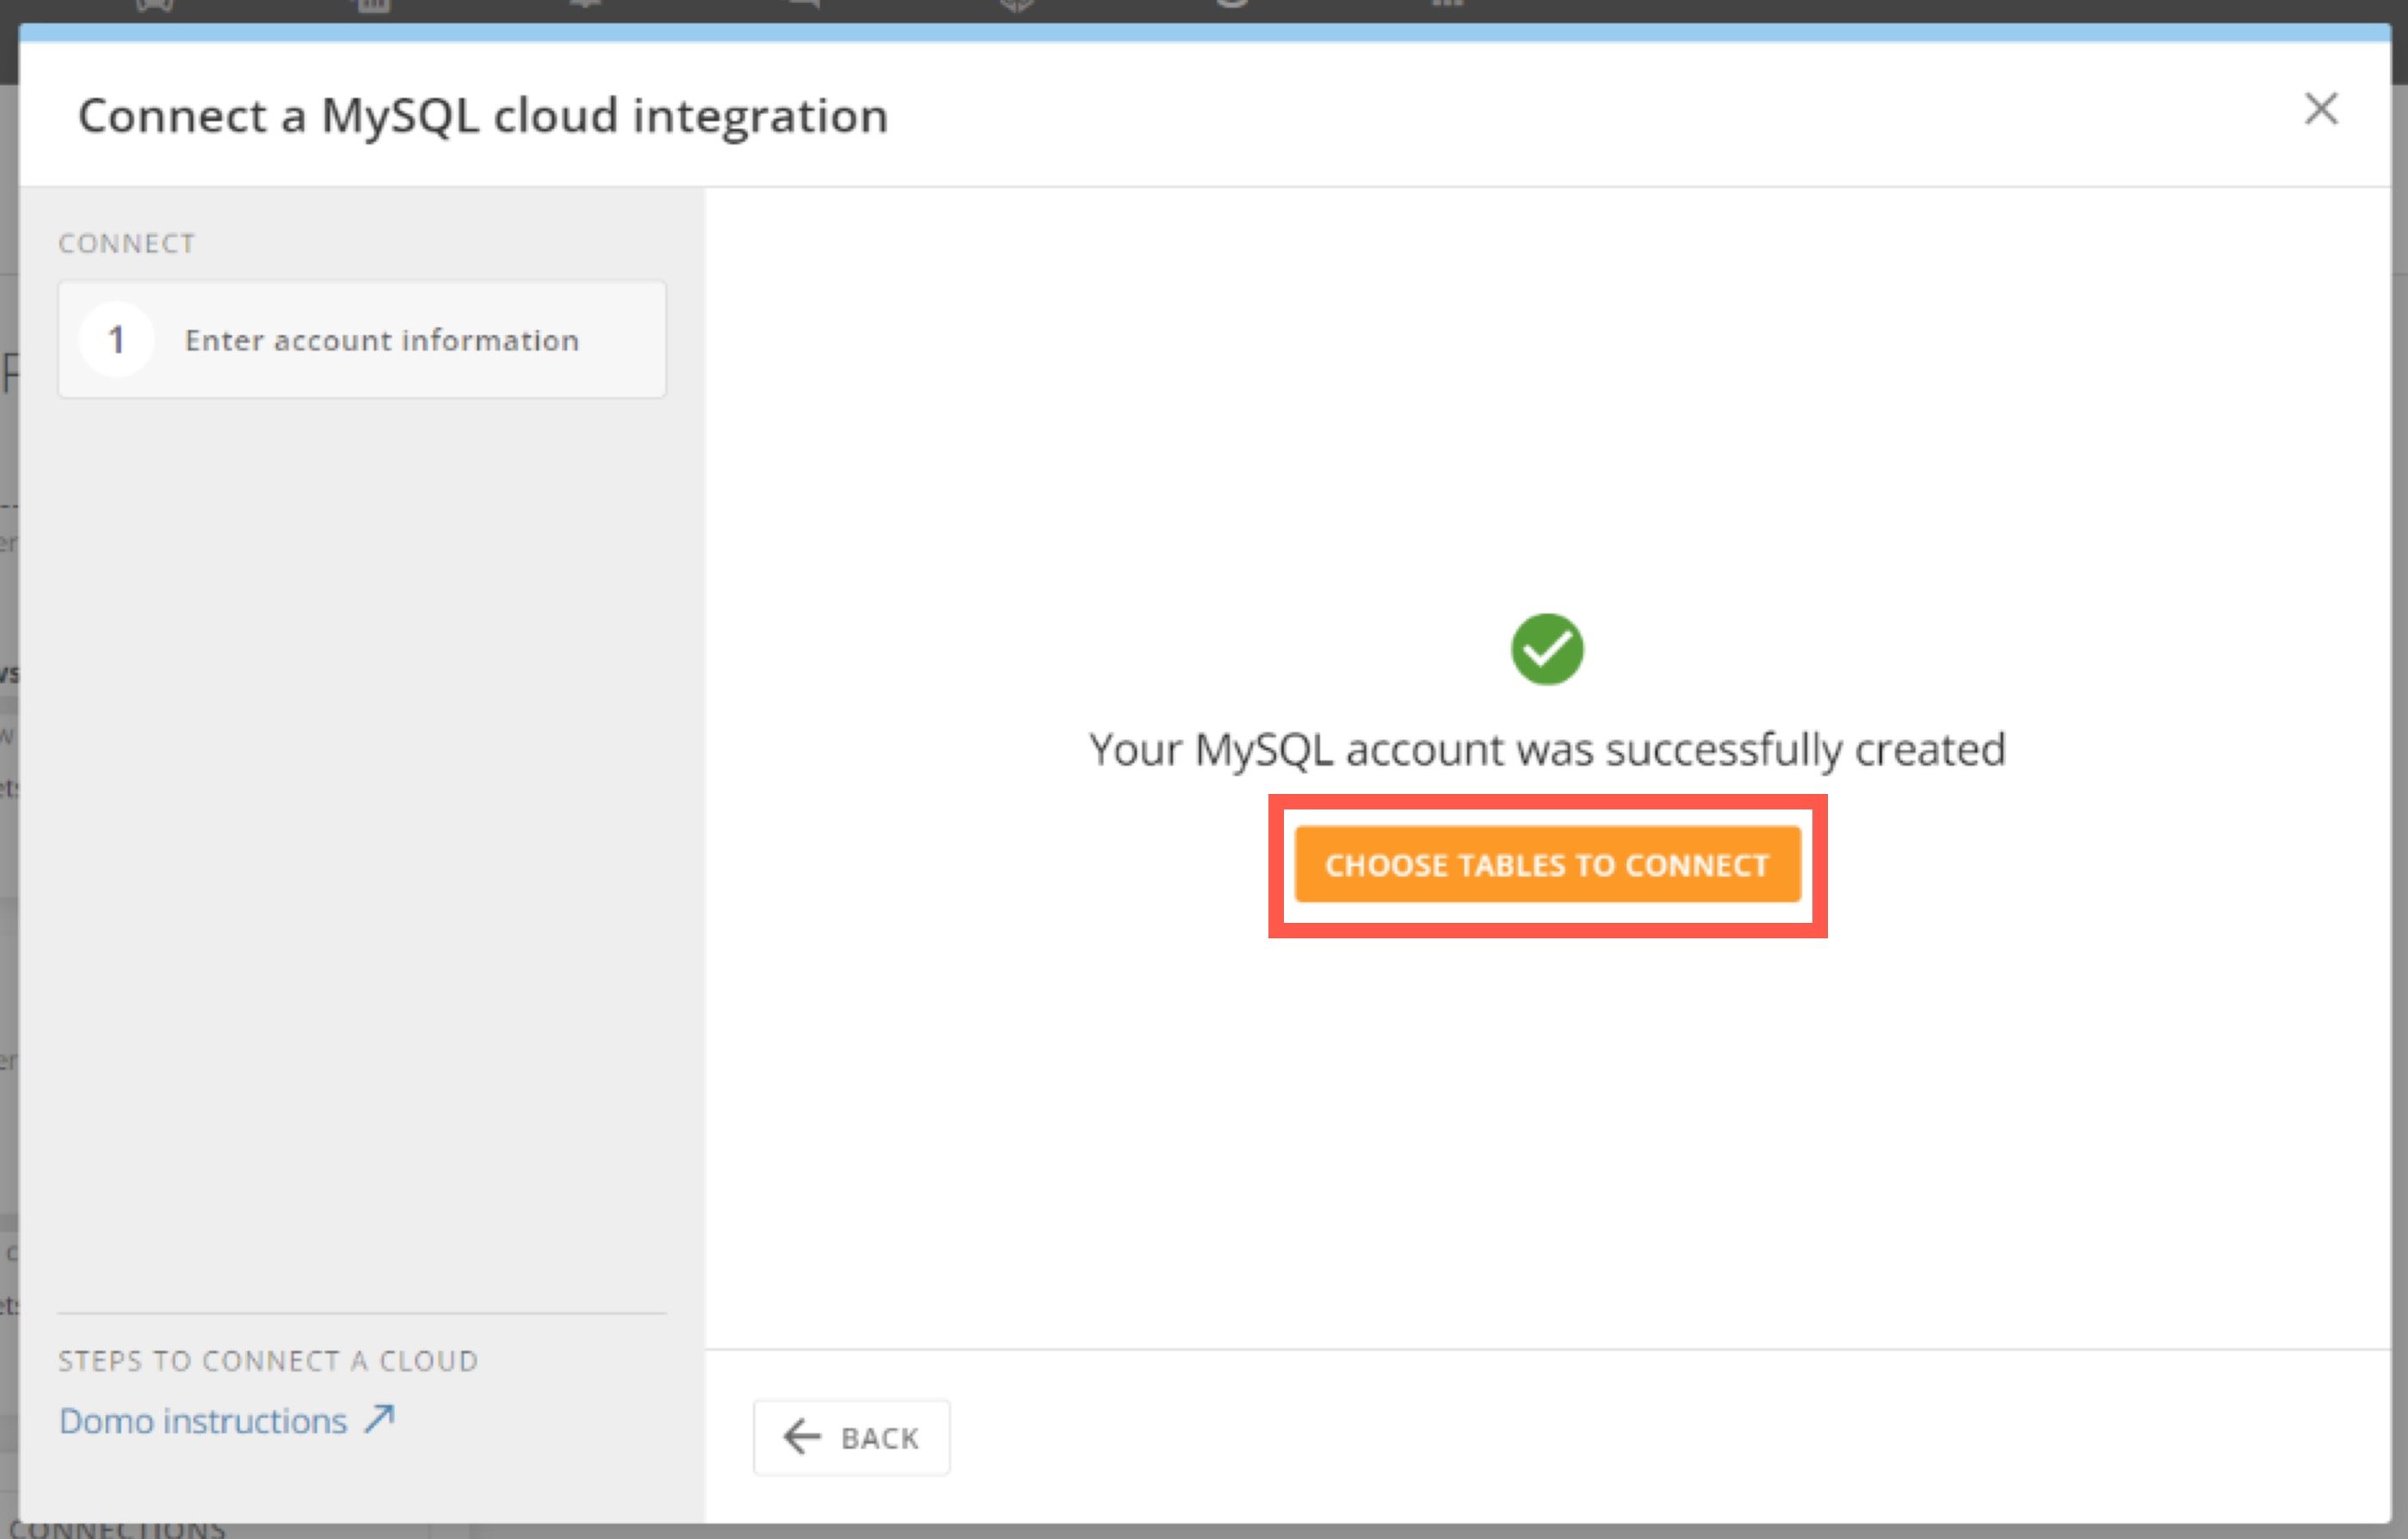
   成功メッセージが表示されます。

10. **［Choose Tables to Connect］** を選択して、テーブルピッカーを開きます。

    <Frame>
      <img alt="choose tables to connect.jpg" src="https://mintcdn.com/domoinc-openapi-sync-dataflows/EpEQaVXeYQJOgZLs/images/kb/ka0Vq000000CwrR-00N5w00000Ri7BU-0EMVq000000uXCb.jpg?fit=max&auto=format&n=EpEQaVXeYQJOgZLs&q=85&s=8cfac9851671631b49464092db9dc69c" width="2802" height="1791" data-path="images/kb/ka0Vq000000CwrR-00N5w00000Ri7BU-0EMVq000000uXCb.jpg" />
    </Frame>

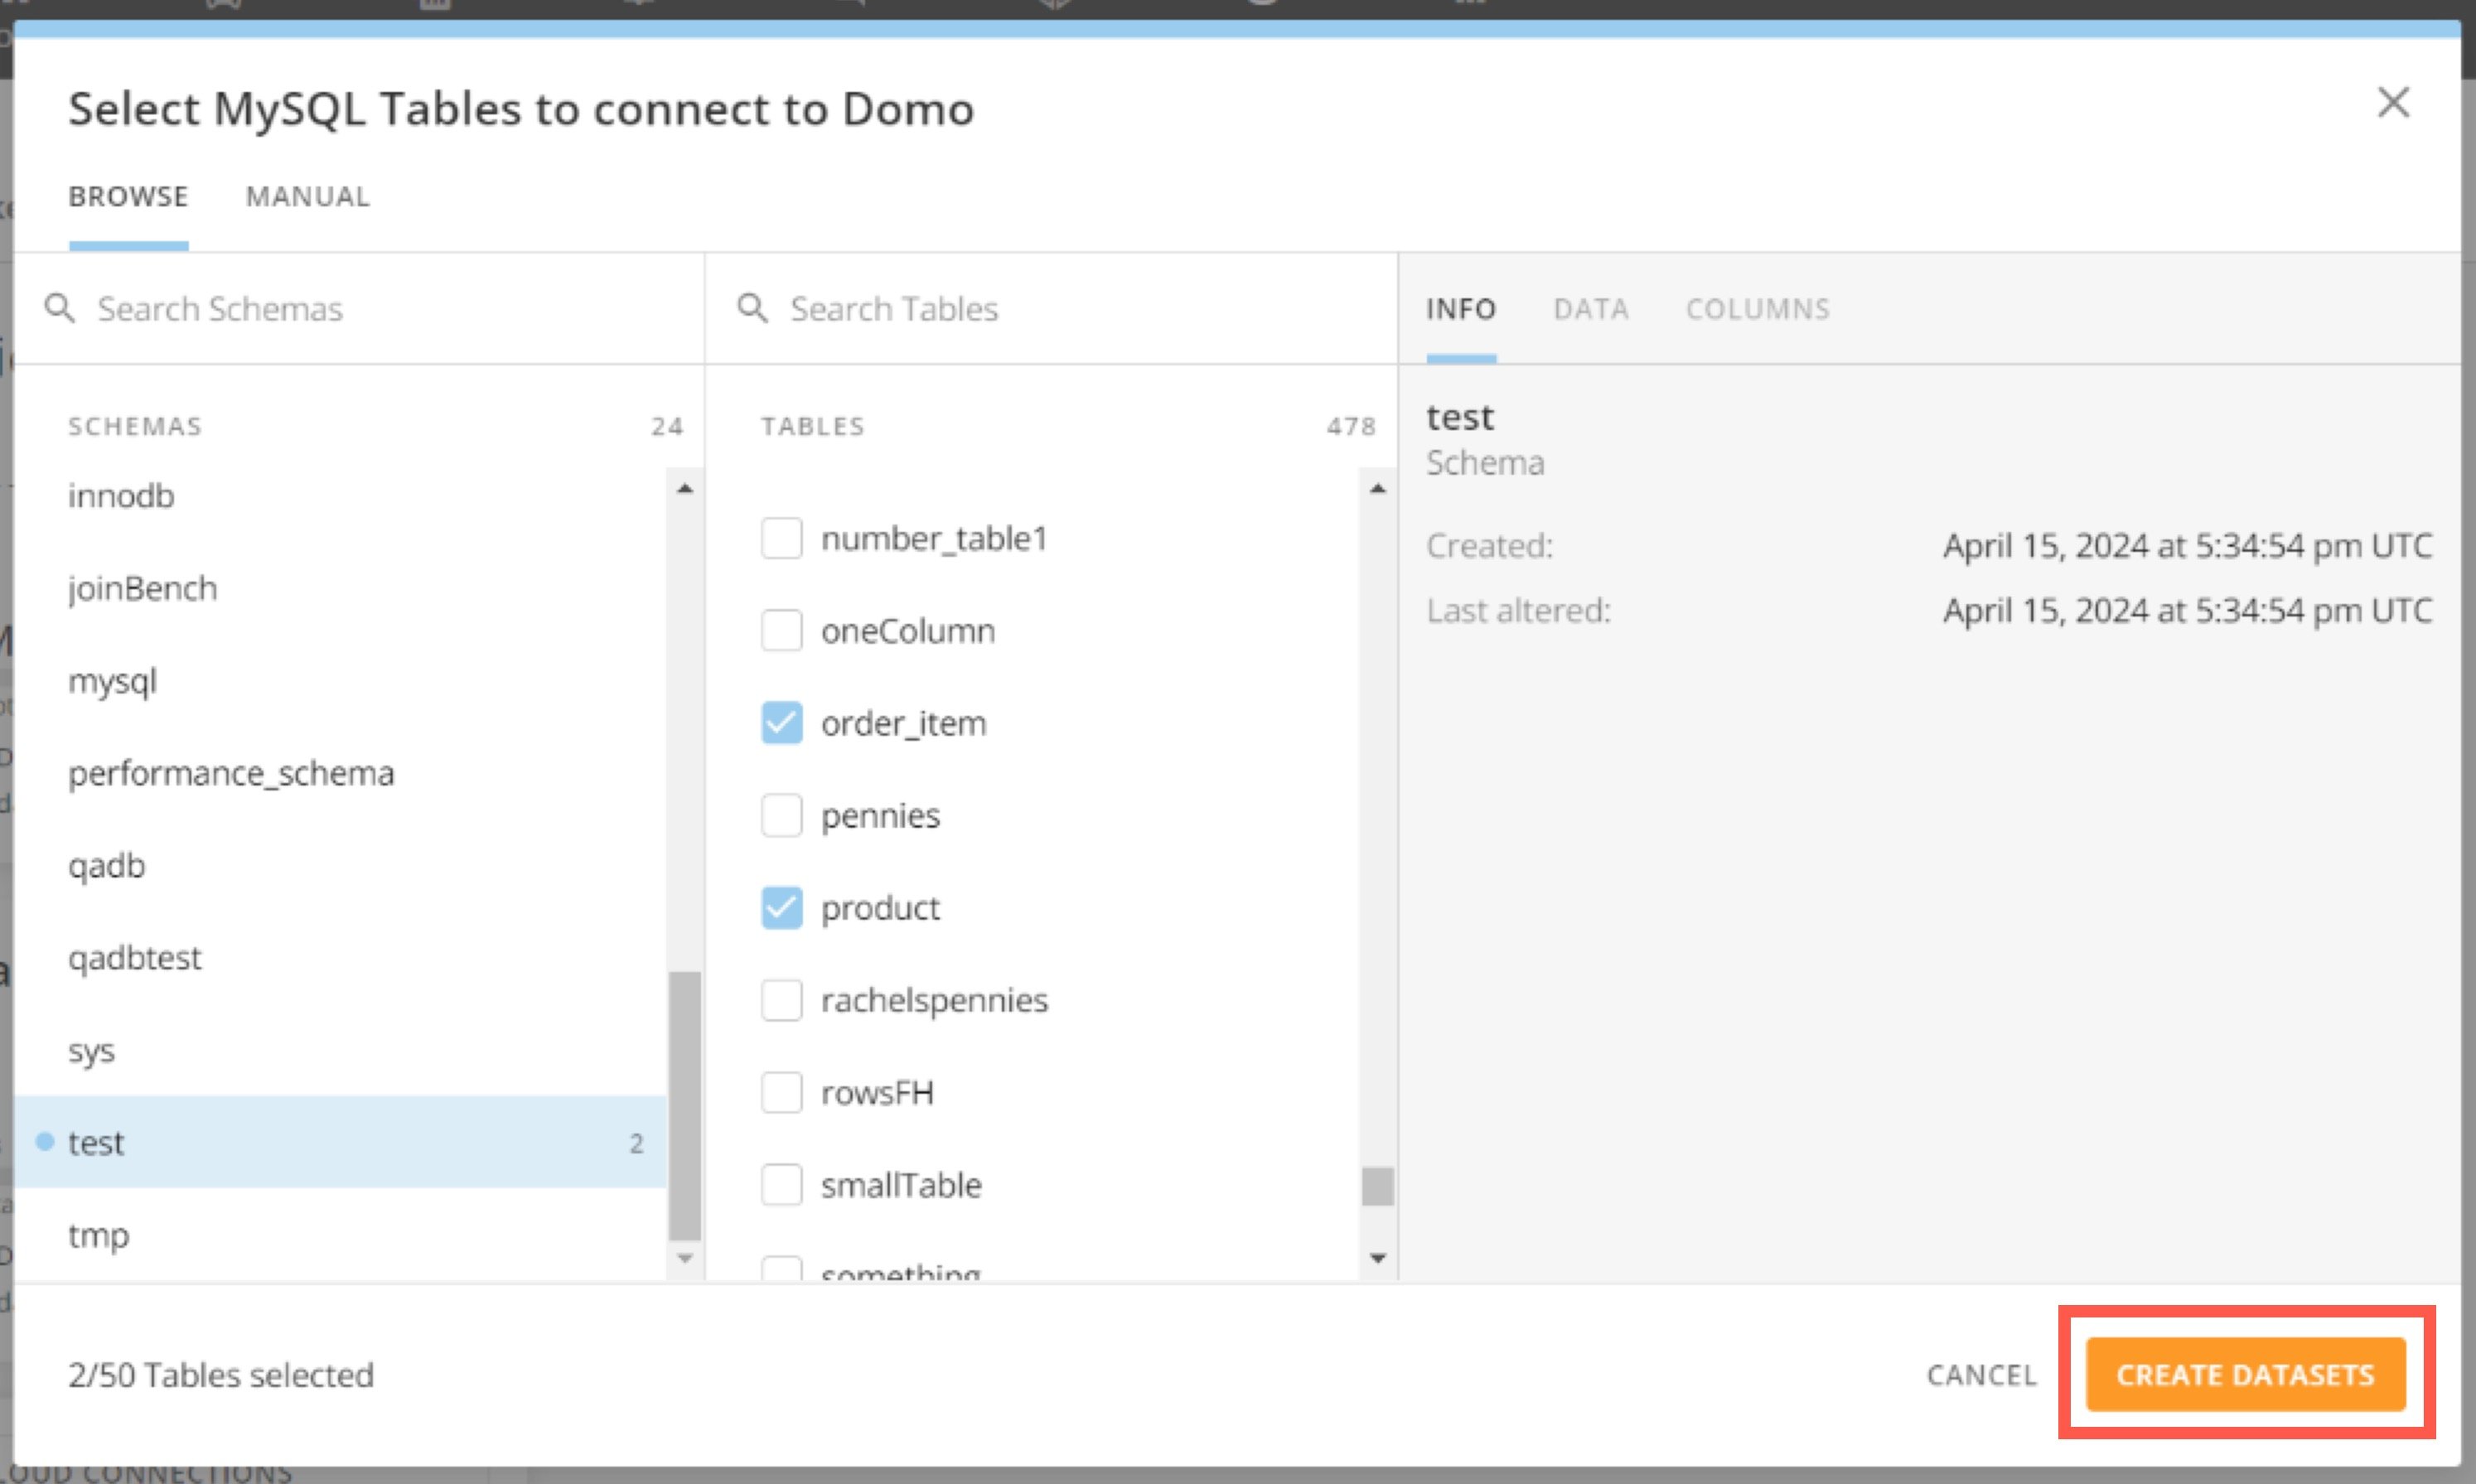
11. スキーマとテーブルを選択し、準備ができたら、**［DataSetを作成］** を選択します。

    <Frame>
      <img alt="create datasets.jpg" src="https://mintcdn.com/domoinc-openapi-sync-dataflows/EpEQaVXeYQJOgZLs/images/kb/ka0Vq000000CwrR-00N5w00000Ri7BU-0EMVq000000uXFp.jpg?fit=max&auto=format&n=EpEQaVXeYQJOgZLs&q=85&s=fe7910a09a6b1a1dcfbbf3632a10bf75" width="2988" height="1791" data-path="images/kb/ka0Vq000000CwrR-00N5w00000Ri7BU-0EMVq000000uXFp.jpg" />
    </Frame>

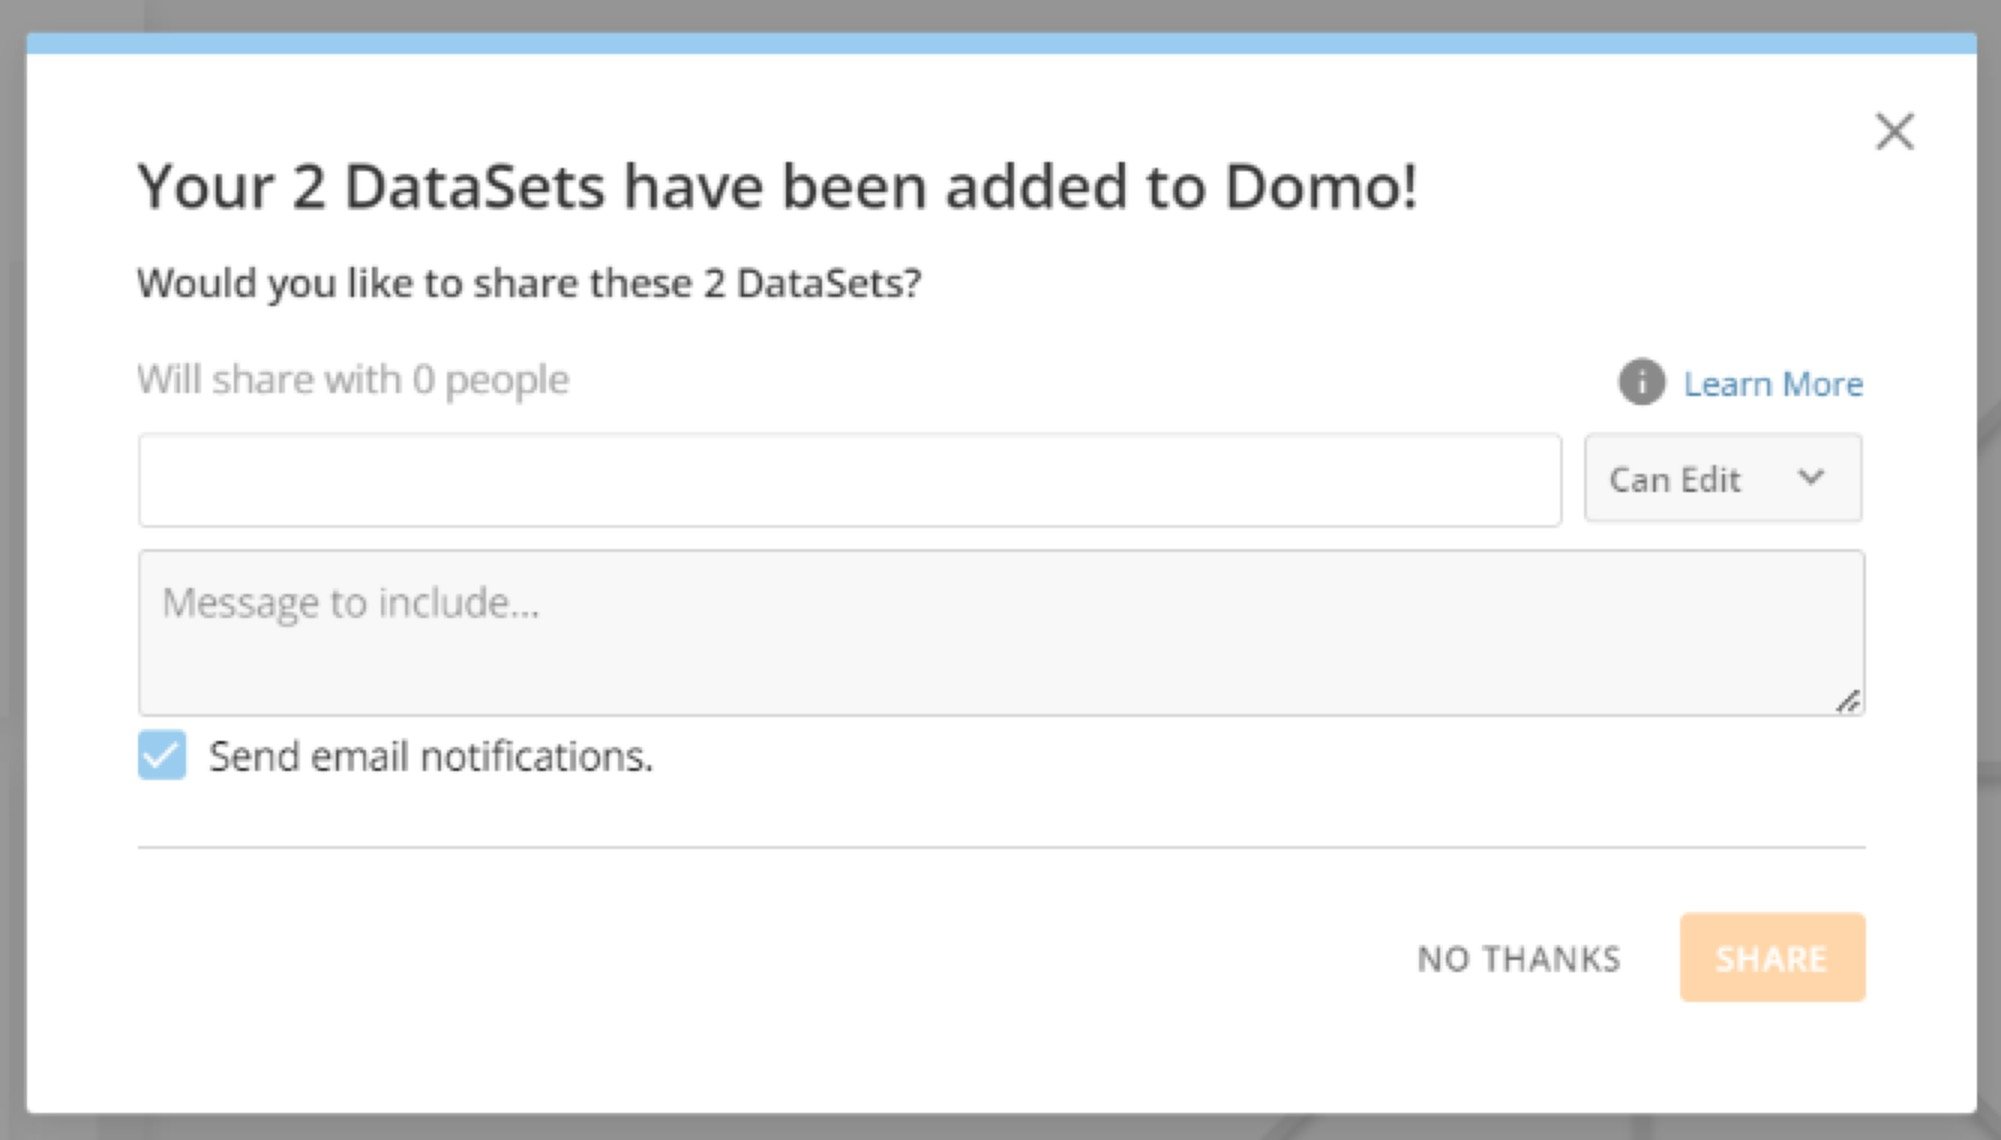
12. （オプション）確認モーダルでは、DataSetをほかのDomoユーザーとシェアできます。

    <Frame>
      <img alt="share modal.jpg" src="https://mintcdn.com/domoinc-openapi-sync-dataflows/a4f3szIEyPCXGEyk/images/kb/ka0Vq000000BCNd-00N5w00000Ri7BU-0EMVq000000uXZB.jpg?fit=max&auto=format&n=a4f3szIEyPCXGEyk&q=85&s=787cc3bafe733301654696217f80be34" width="2001" height="1140" data-path="images/kb/ka0Vq000000BCNd-00N5w00000Ri7BU-0EMVq000000uXZB.jpg" />
    </Frame>

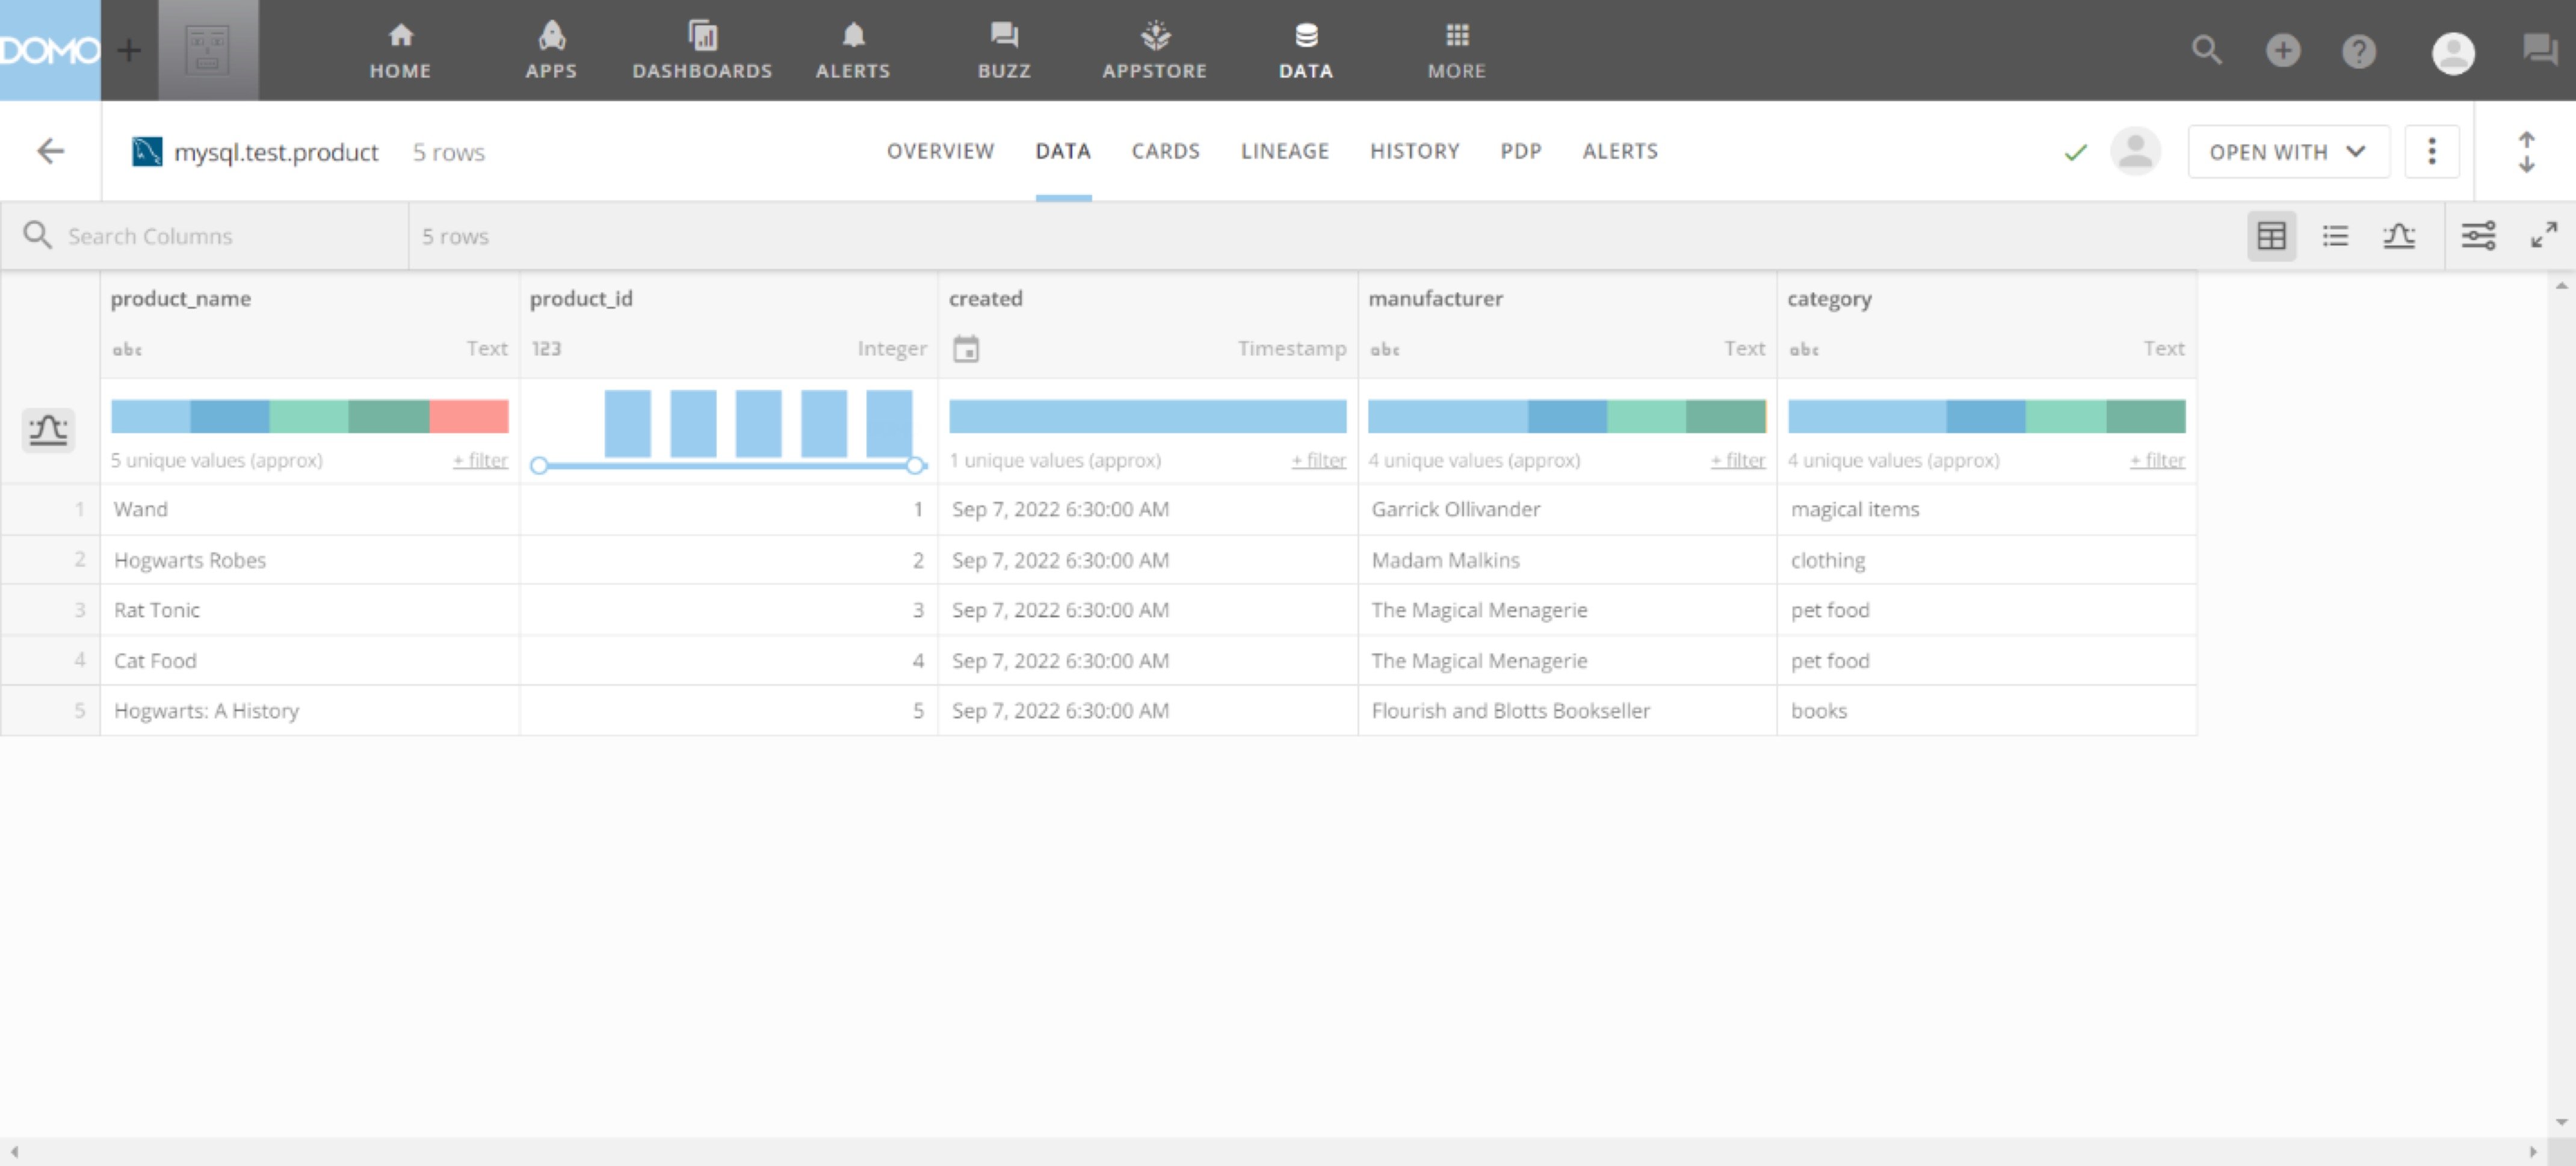
DomoでMySQL DataSetとやり取りできるようになりました。

<Frame>
  <img alt="mysql data.jpg" src="https://mintcdn.com/domoinc-openapi-sync-dataflows/EpEQaVXeYQJOgZLs/images/kb/ka0Vq000000CwrR-00N5w00000Ri7BU-0EMVq000000uXcP.jpg?fit=max&auto=format&n=EpEQaVXeYQJOgZLs&q=85&s=012882965e3b51703c72f0e8e85781e6" width="4281" height="1938" data-path="images/kb/ka0Vq000000CwrR-00N5w00000Ri7BU-0EMVq000000uXcP.jpg" />
</Frame>