> ## Documentation Index
> Fetch the complete documentation index at: https://domoinc-openapi-sync-dataflows.mintlify.site/llms.txt
> Use this file to discover all available pages before exploring further.

# Azure SQLとCloud Integrations（ベータ版）

## はじめに

Azure SQLユーザーは、Cloud Integrationsのネイティブ統合を通じて、自分のデータをDomoに接続できます。まず接続パラメーターを指定し、Domo DataSetとして表示するテーブルを選択します。

## Azure SQL統合を作成する

この記事の手順に従って、読み取り専用のAzure SQL–Domo統合を設定します。

1. Domo Data Centerで<img alt="data warehouse.jpg" src="https://mintcdn.com/domoinc-openapi-sync-dataflows/t8AZQgYc1CvVIAgR/images/kb/ja/0EMVq000000uR3y.jpg?fit=max&auto=format&n=t8AZQgYc1CvVIAgR&q=85&s=3c9c337229995177f50a4aebbf39d395" style={{width: 24, height: 24, display: 'inline', verticalAlign: 'start', margin: '0'}} width="48" height="48" data-path="images/kb/ja/0EMVq000000uR3y.jpg" />

   \*\*［Data Warehouse］\*\*に移動します。

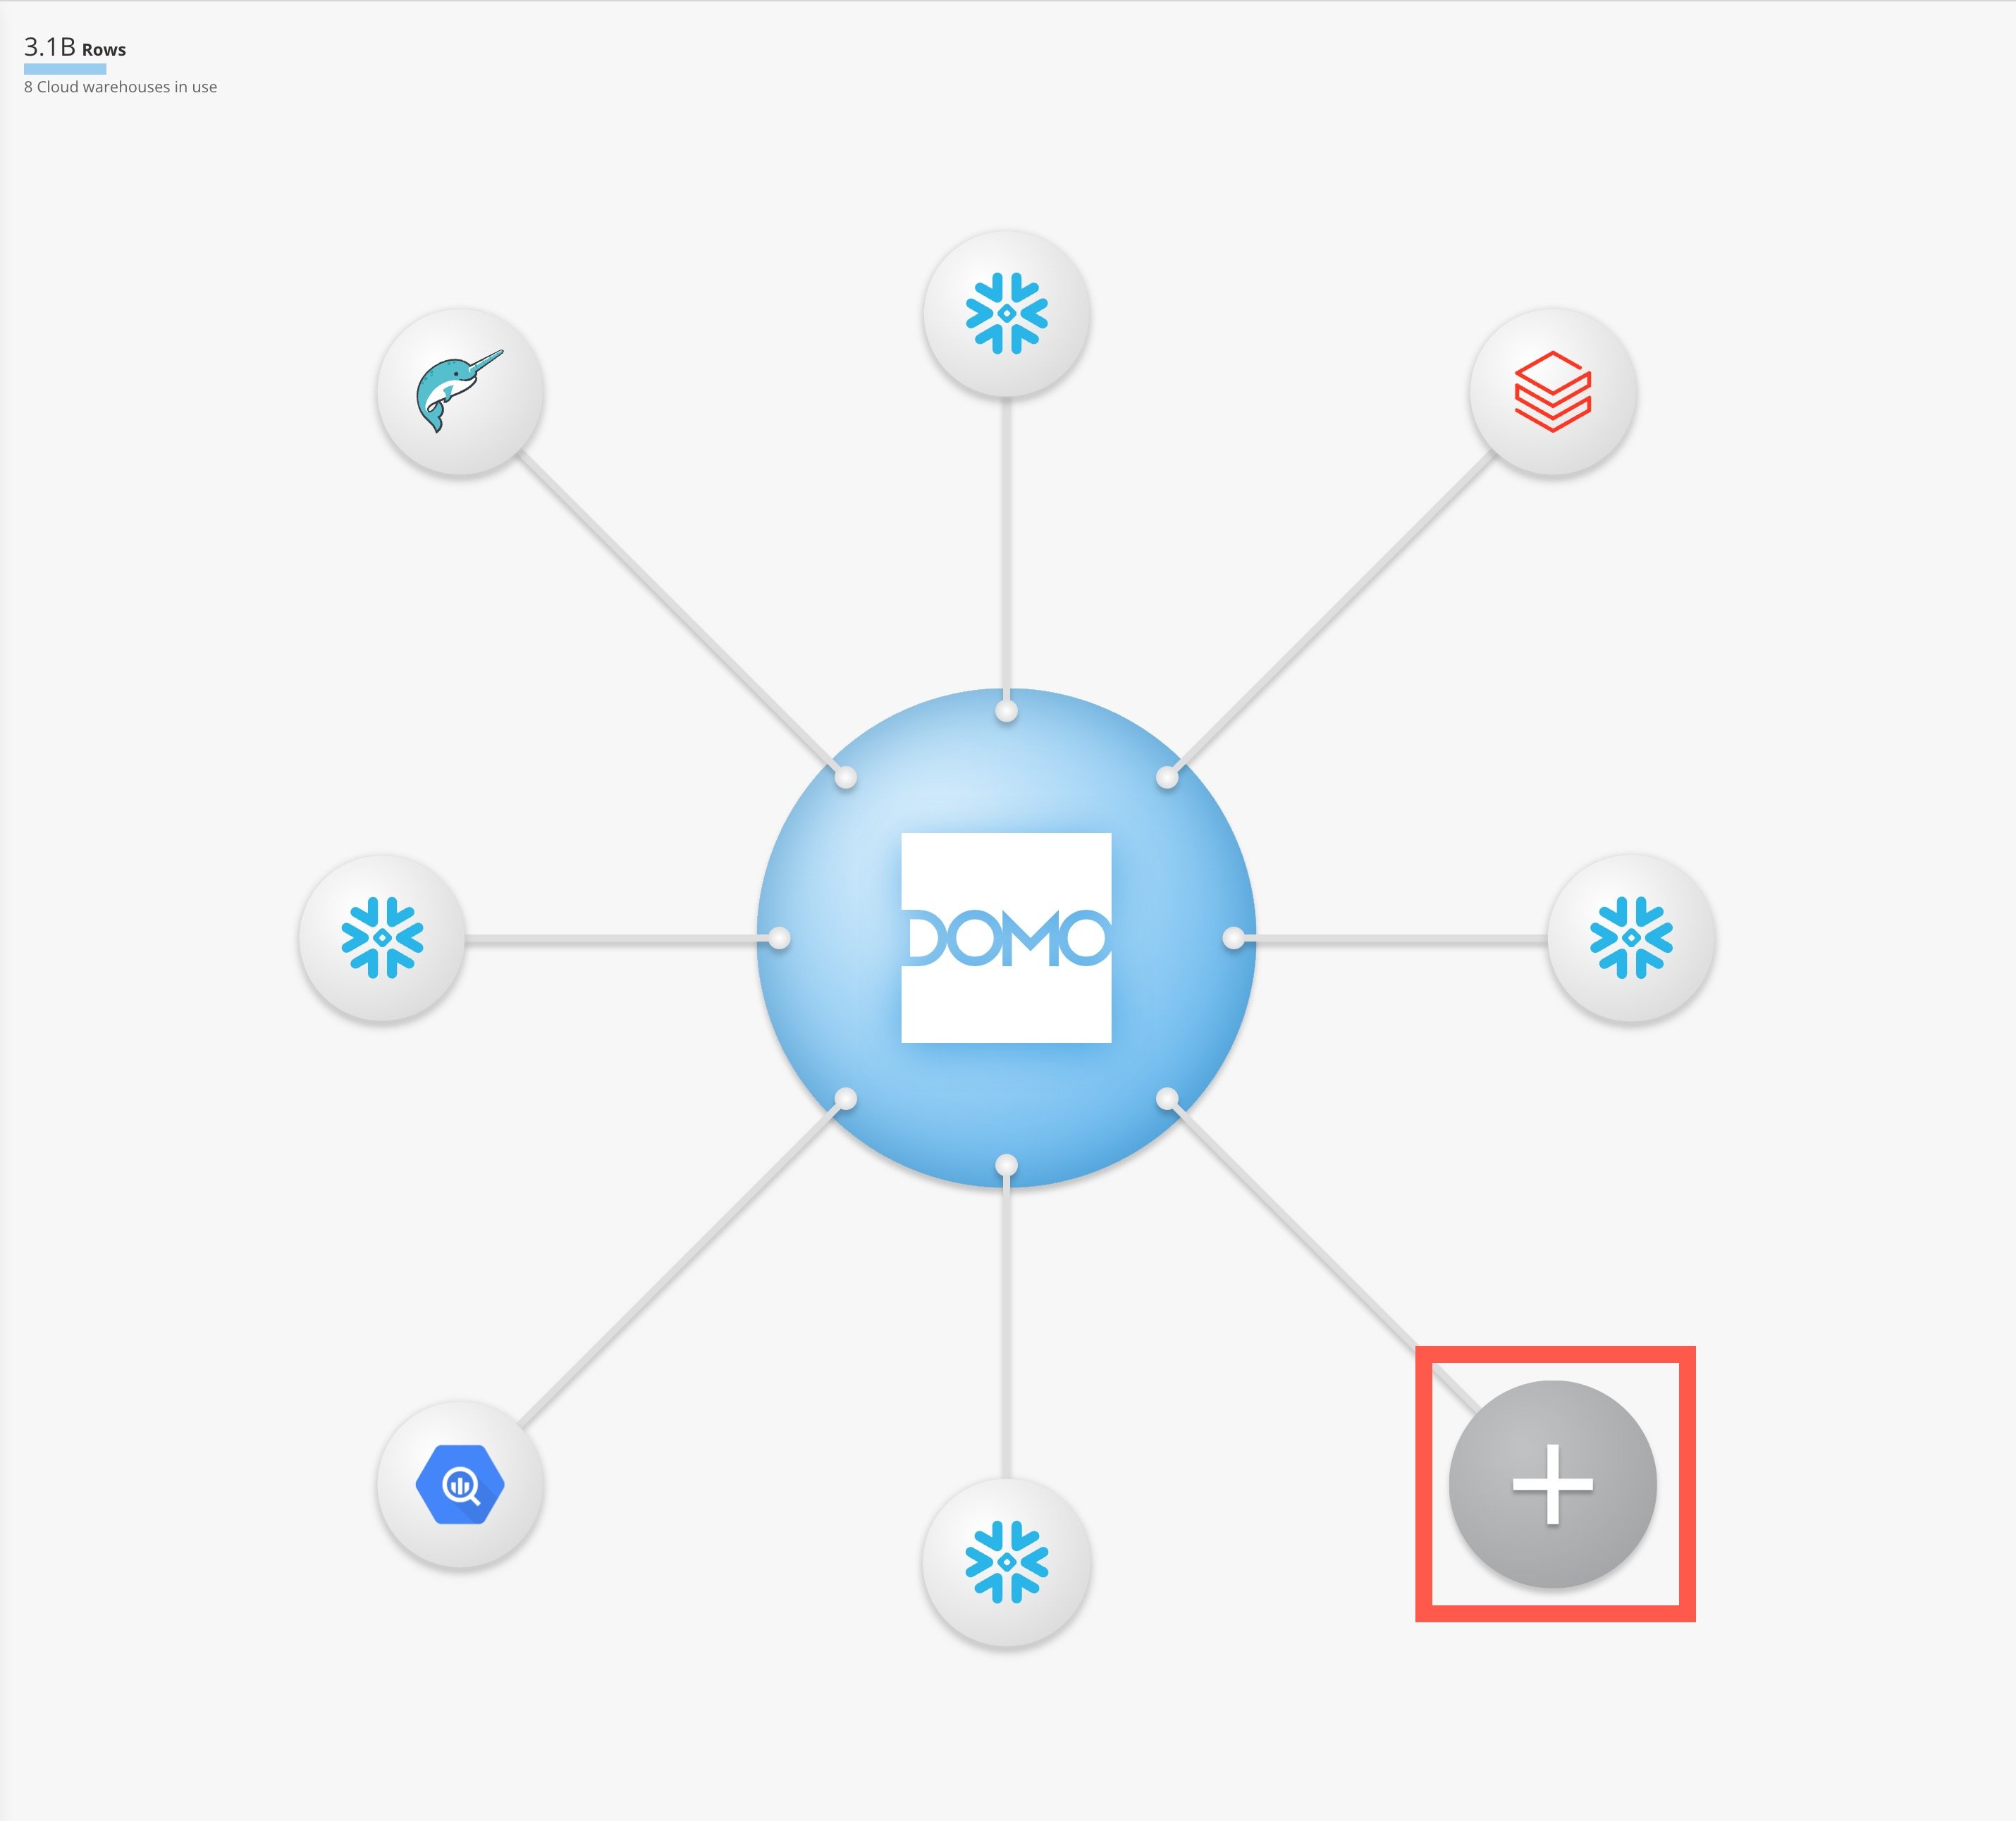
2. <img alt="add.jpg" src="https://mintcdn.com/domoinc-openapi-sync-dataflows/t8AZQgYc1CvVIAgR/images/kb/ja/0EMVq000000uSeO.jpg?fit=max&auto=format&n=t8AZQgYc1CvVIAgR&q=85&s=36799dcf3e8bf82bf4d127607a1e615b" style={{width: 23, height: 23, display: 'inline', verticalAlign: 'start', margin: '0'}} width="226" height="224" data-path="images/kb/ja/0EMVq000000uSeO.jpg" />

   \*\*［新しいクラウドアカウントを追加］\*\*を選択します。

   <Frame>
     <img src="https://mintcdn.com/domoinc-openapi-sync-dataflows/t8AZQgYc1CvVIAgR/images/kb/ja/0EMVq000000uRaE.jpg?fit=max&auto=format&n=t8AZQgYc1CvVIAgR&q=85&s=dc1ca2565593d1bf979ee202312b7869" alt="add new cloud account.jpg" width="2860" height="2584" data-path="images/kb/ja/0EMVq000000uRaE.jpg" />
   </Frame>

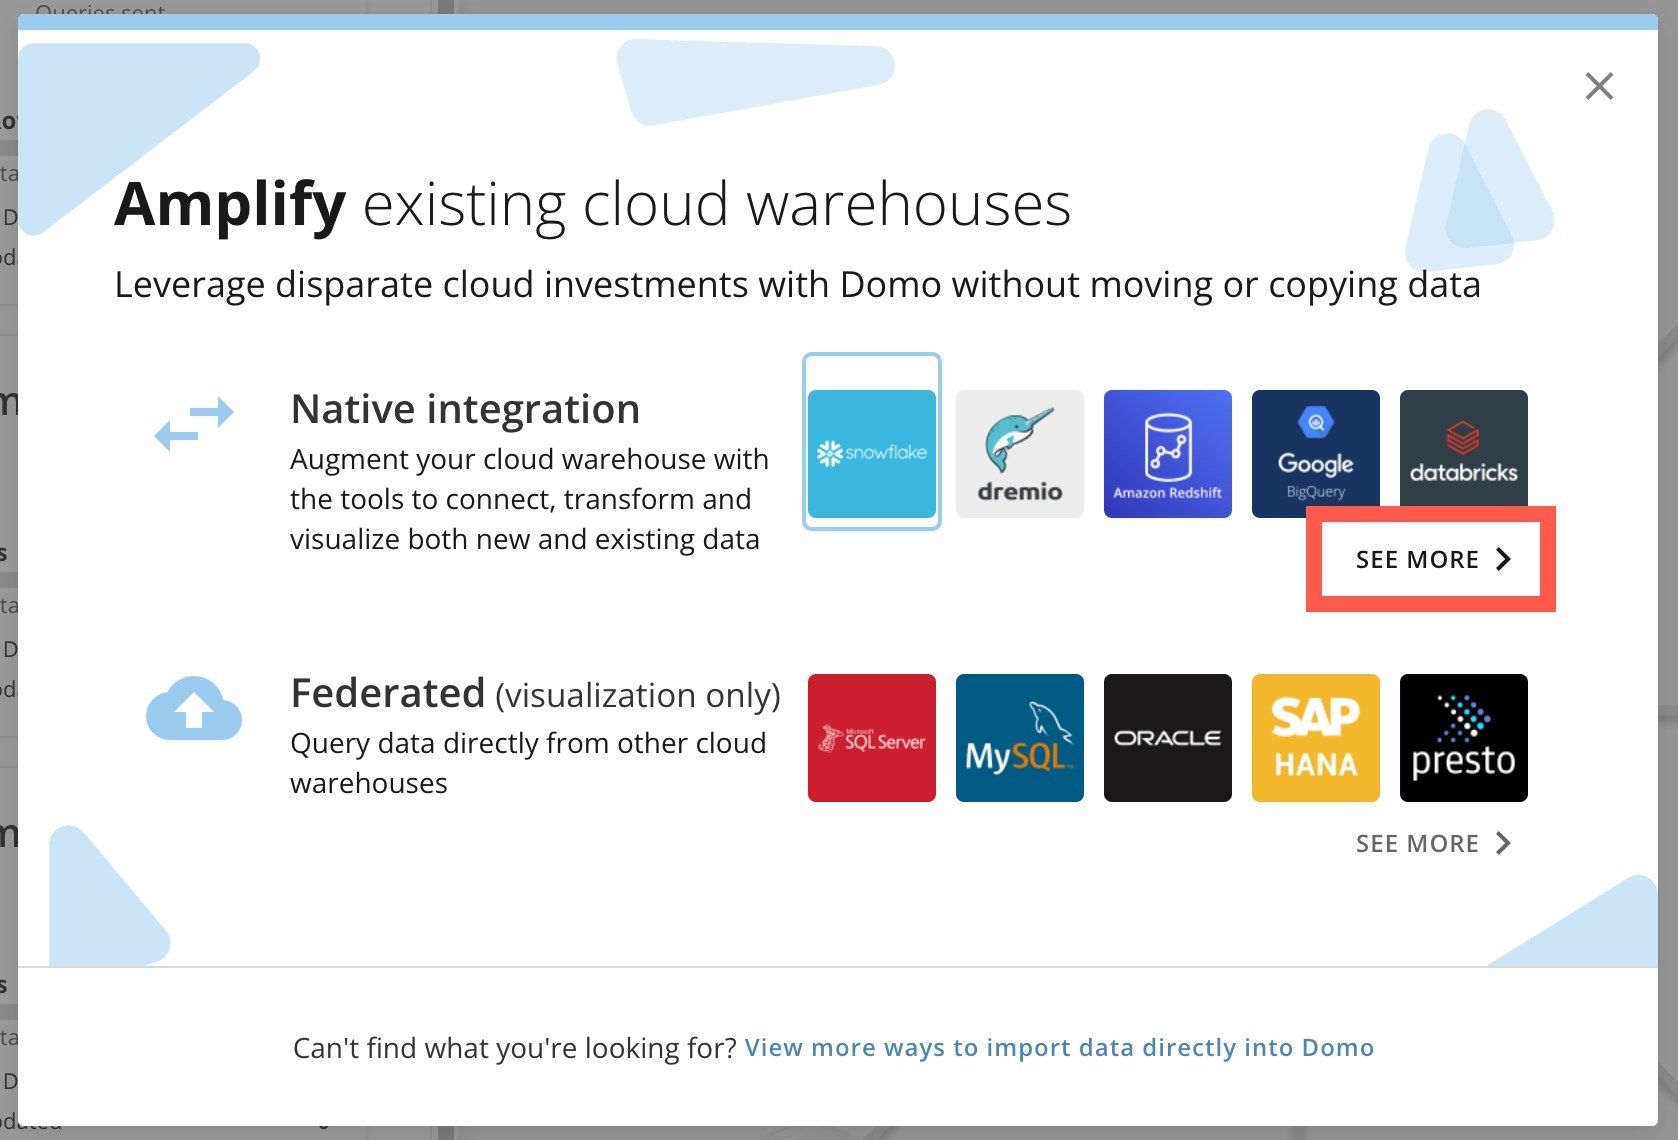
   \*\*［既存のクラウドウェアハウスを拡大する］\*\*モーダルが表示されます。

3. \*\*［ネイティブ統合］**セクションの**［詳細を見る］\*\*を選択して、ほかのオプションを表示します。

   <Frame>
     <img src="https://mintcdn.com/domoinc-openapi-sync-dataflows/t8AZQgYc1CvVIAgR/images/kb/ja/0EMVq000000uTIf.jpg?fit=max&auto=format&n=t8AZQgYc1CvVIAgR&q=85&s=8514782f82ea67cbe5d37354b4de0b6a" alt="see more.jpg" width="1678" height="1140" data-path="images/kb/ja/0EMVq000000uTIf.jpg" />
   </Frame>

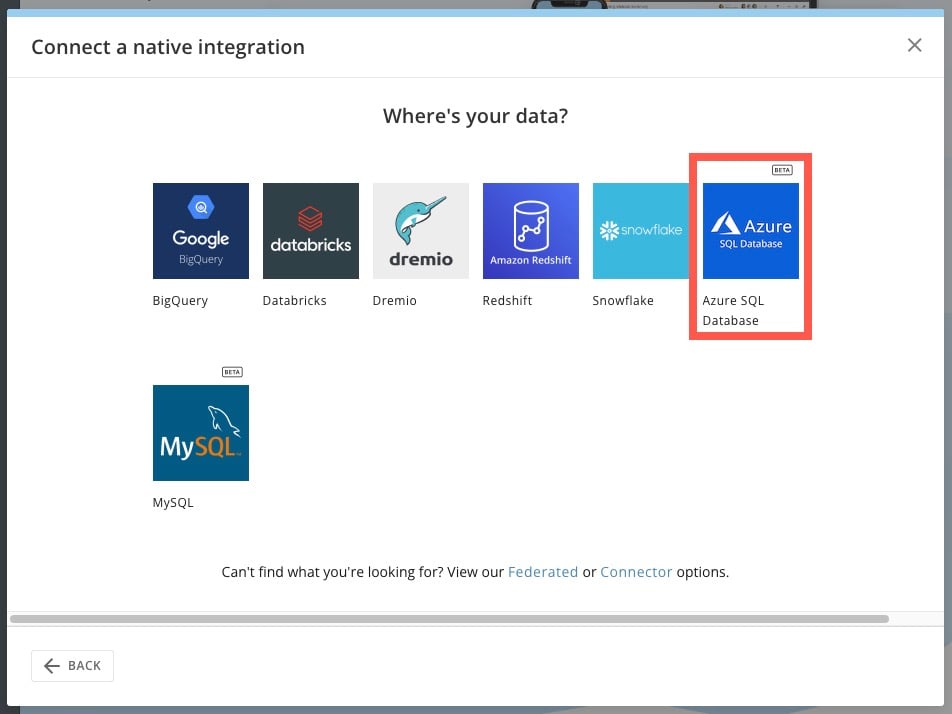
4. \*\*［Azure SQL］\*\*を選択します。

   <Frame>
     <img src="https://mintcdn.com/domoinc-openapi-sync-dataflows/4lEEU32XA896xmLM/images/kb/ja/0EMVq000001JtzW.jpg?fit=max&auto=format&n=4lEEU32XA896xmLM&q=85&s=814dbaebd226ad4fb67c5086b0a24d8c" alt="choose azure sql.jpg" width="952" height="714" data-path="images/kb/ja/0EMVq000001JtzW.jpg" />
   </Frame>

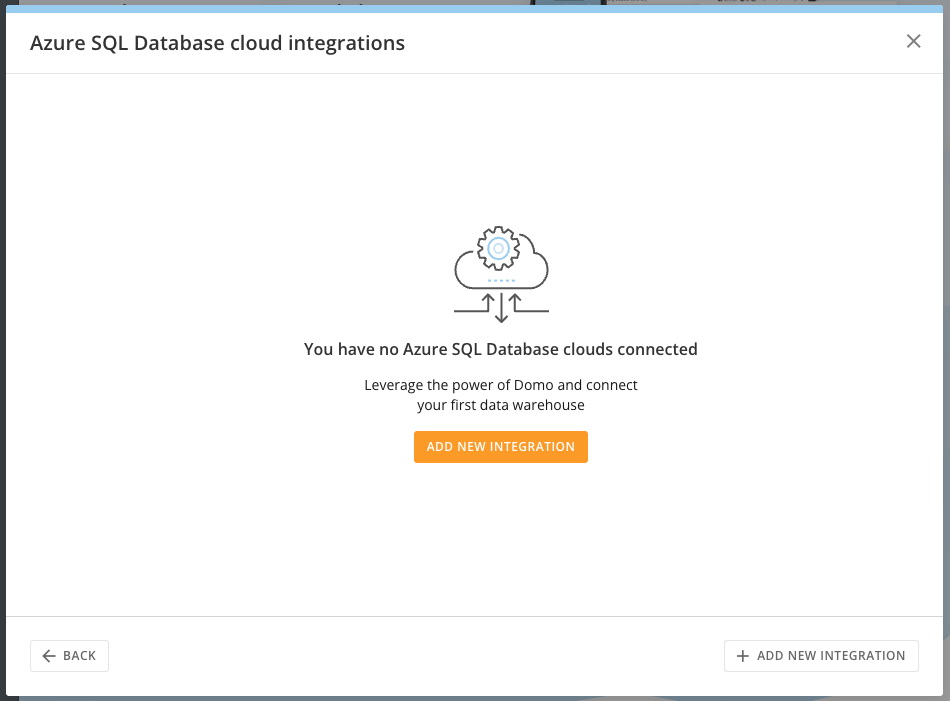
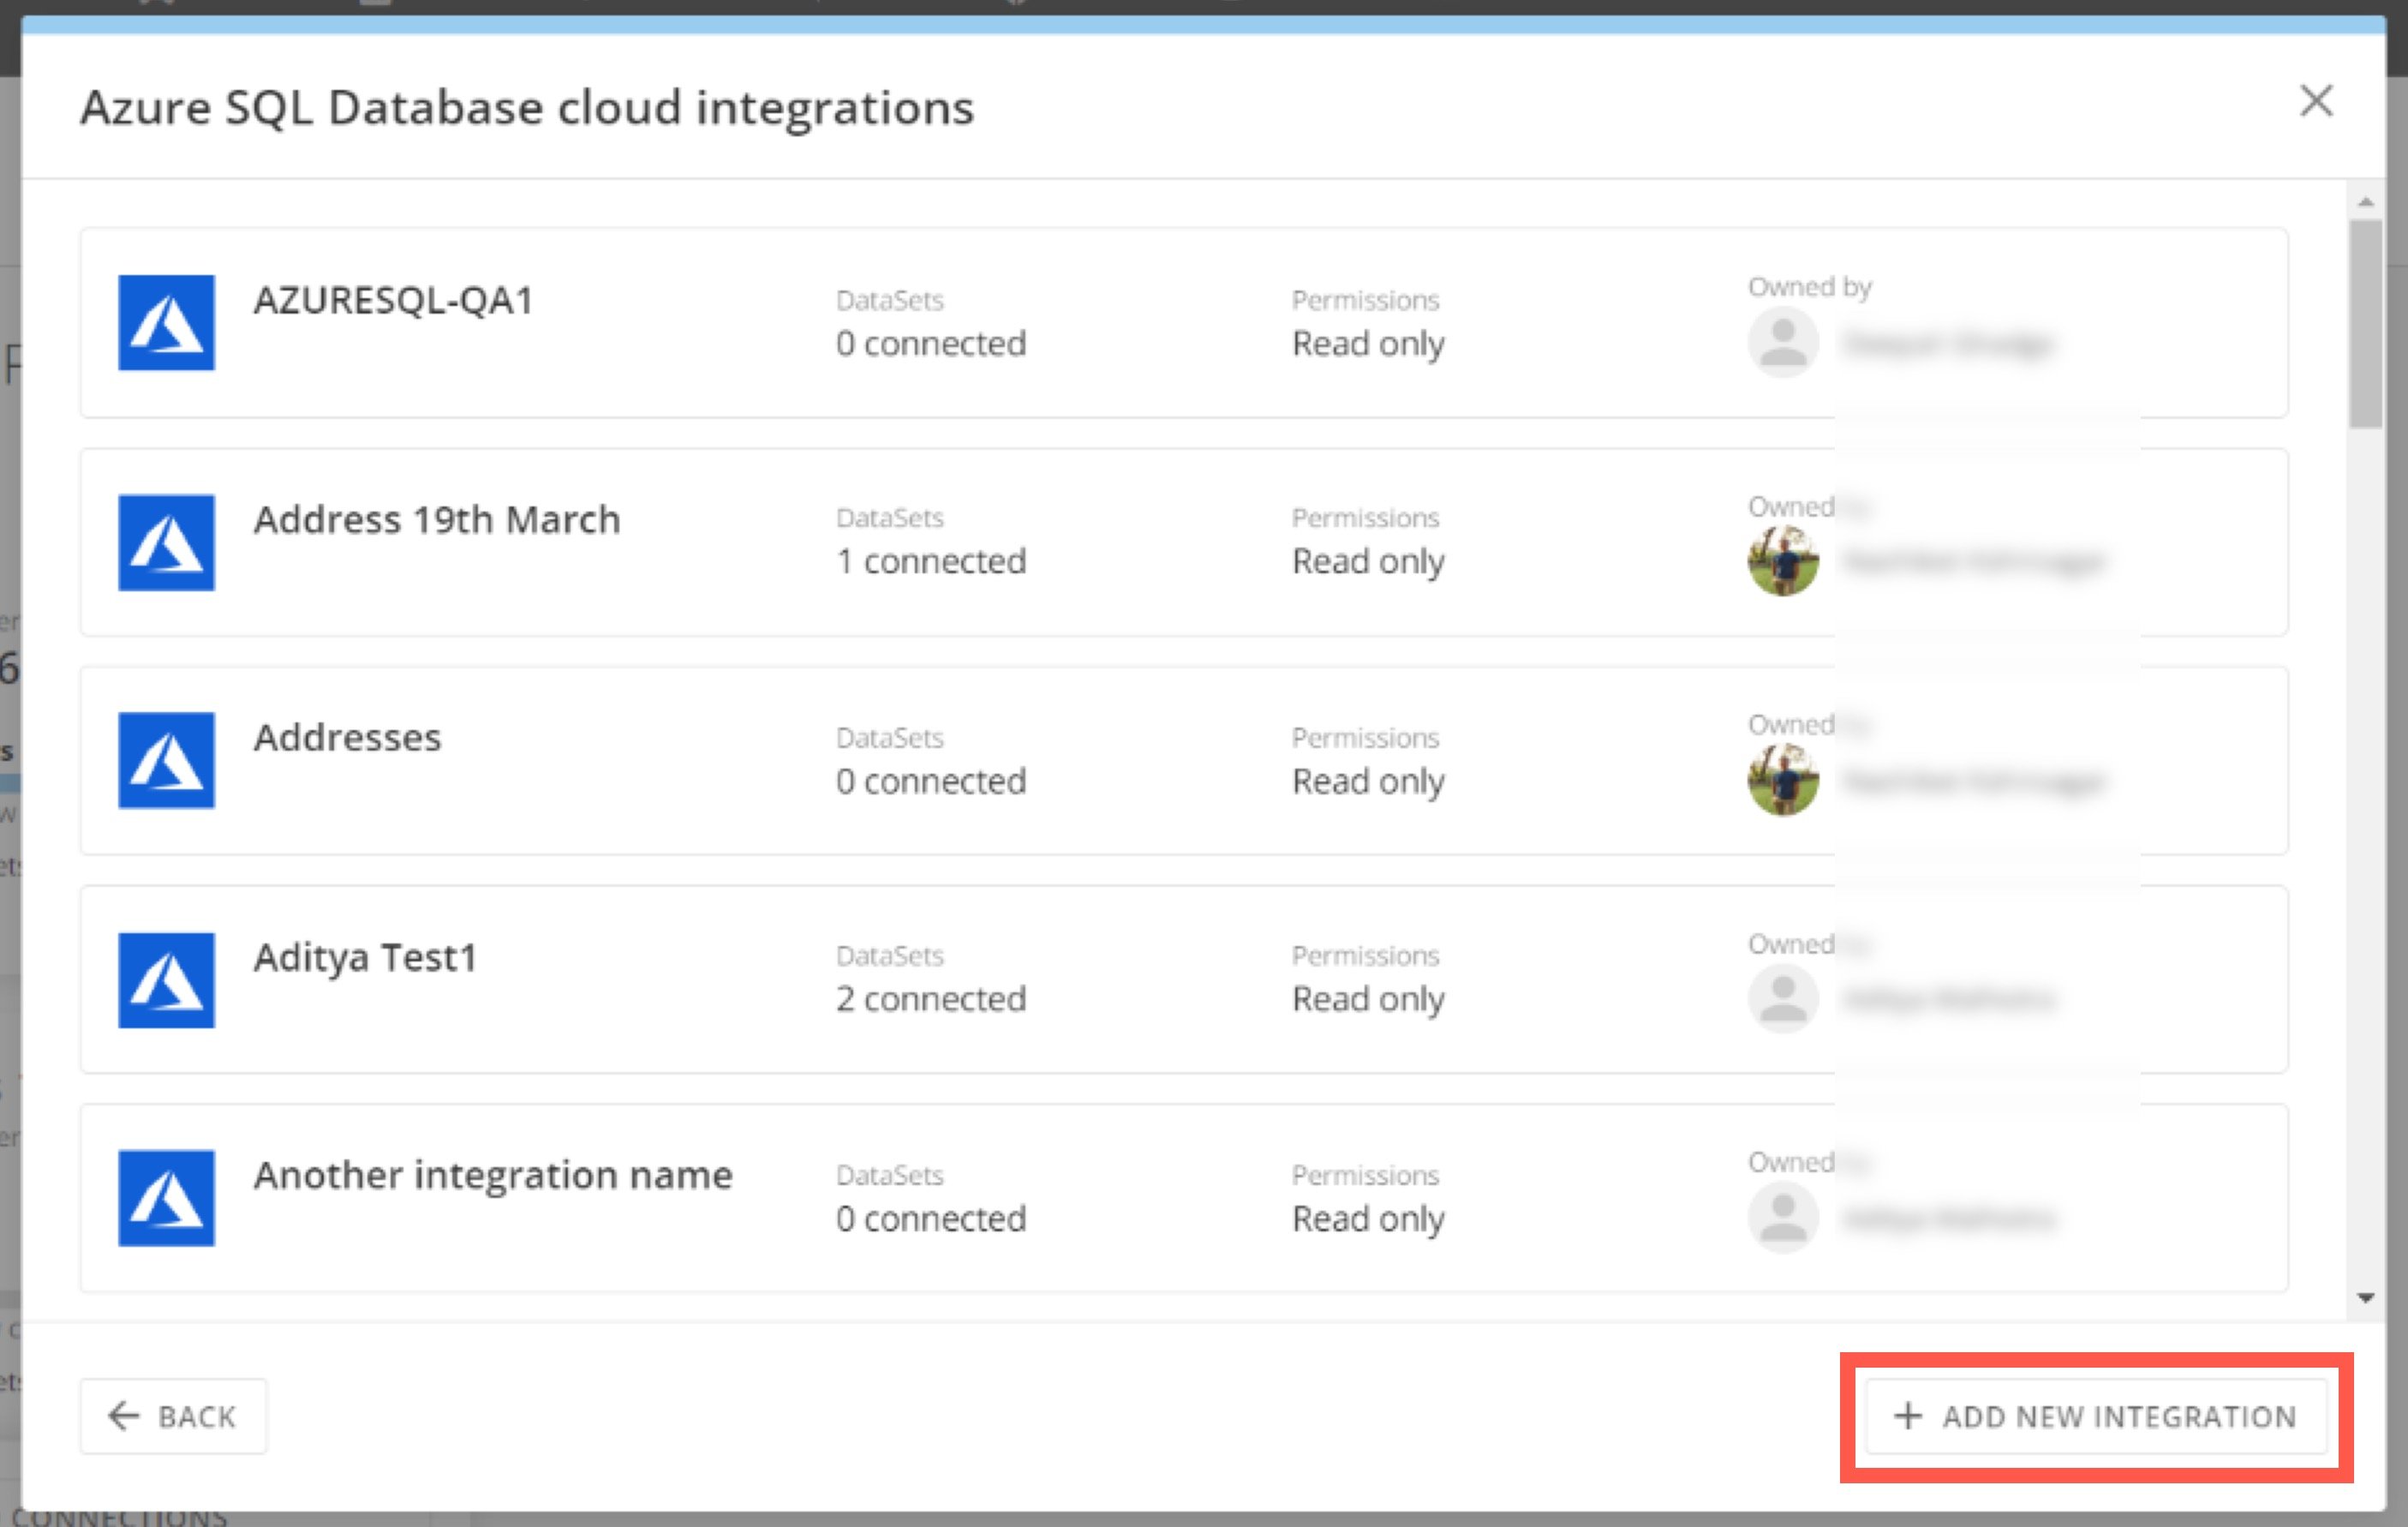
5. \*\*［+新しい統合を追加］\*\*を選択します。

   <Frame>
     <img src="https://mintcdn.com/domoinc-openapi-sync-dataflows/4lEEU32XA896xmLM/images/kb/ja/0EMVq000001K1Yr.jpg?fit=max&auto=format&n=4lEEU32XA896xmLM&q=85&s=3ba107e53f11dffb4915cb810b188808" alt="Screenshot 2024-06-12 at 3.43.27 PM.png" width="950" height="701" data-path="images/kb/ja/0EMVq000001K1Yr.jpg" />
   </Frame>

   <Frame>
     <img src="https://mintcdn.com/domoinc-openapi-sync-dataflows/4lEEU32XA896xmLM/images/kb/ja/0EMVq000001JrL0.jpg?fit=max&auto=format&n=4lEEU32XA896xmLM&q=85&s=db233147ad329cf35729e8bde259c184" alt="add new azure integration.jpg" width="2811" height="1782" data-path="images/kb/ja/0EMVq000001JrL0.jpg" />
   </Frame>

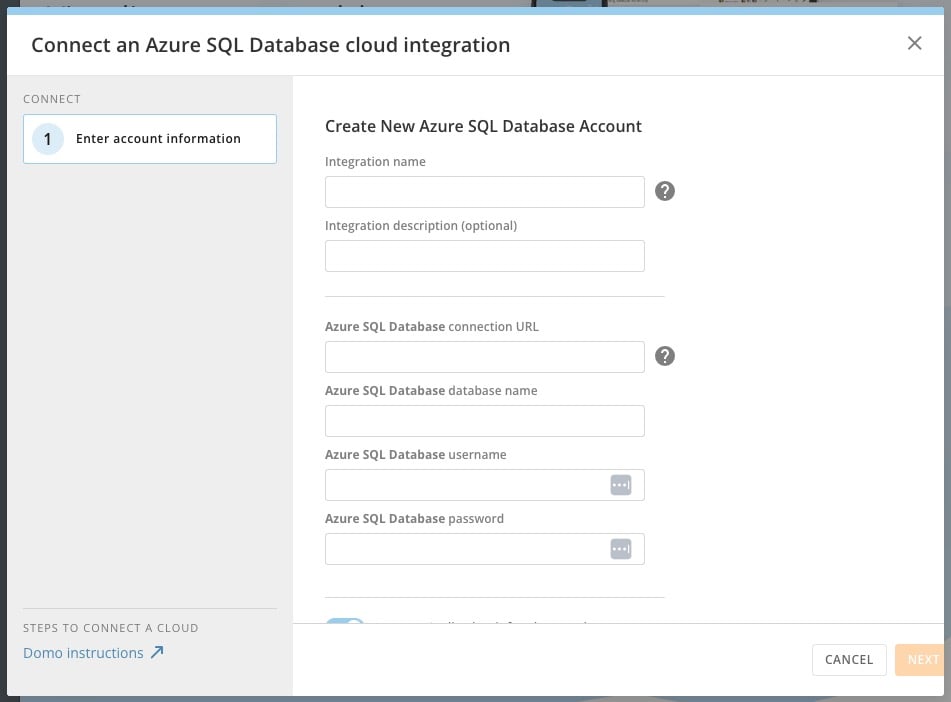
6. Azure SQLデータベースに接続するには、表示されるフィールドに以下の接続パラメーターを入力します。
   * **［統合名］ —** 将来統合を更新する必要が出てきた場合に、統合のリストで検索する名前です。
   * **［統合の説明（オプション）］ —** 統合に関する追加情報。
   * **［Azure SQL Databaseの接続URL］ —** 接続先のAzure SQLインスタンスのホストとポート。例：`<myhost.com:3306>`。
   * **［Azure SQL Databaseのデータベース名］ —** 接続先のテーブルを含むデータベースの名前。
   * **［Azure SQL Databaseユーザー名］ —** 接続先のデータにアクセスできるAzure SQLインスタンスのユーザー名。
   * **［Azure SQL Databaseパスワード］ —** Azure SQLユーザーのパスワード。

     <Frame>
       <img src="https://mintcdn.com/domoinc-openapi-sync-dataflows/4lEEU32XA896xmLM/images/kb/ja/0EMVq000001JwKg.jpg?fit=max&auto=format&n=4lEEU32XA896xmLM&q=85&s=c34fa9921e642b7fb38570d0c063277b" alt="azure sql.jpg" width="951" height="702" data-path="images/kb/ja/0EMVq000001JwKg.jpg" />
     </Frame>

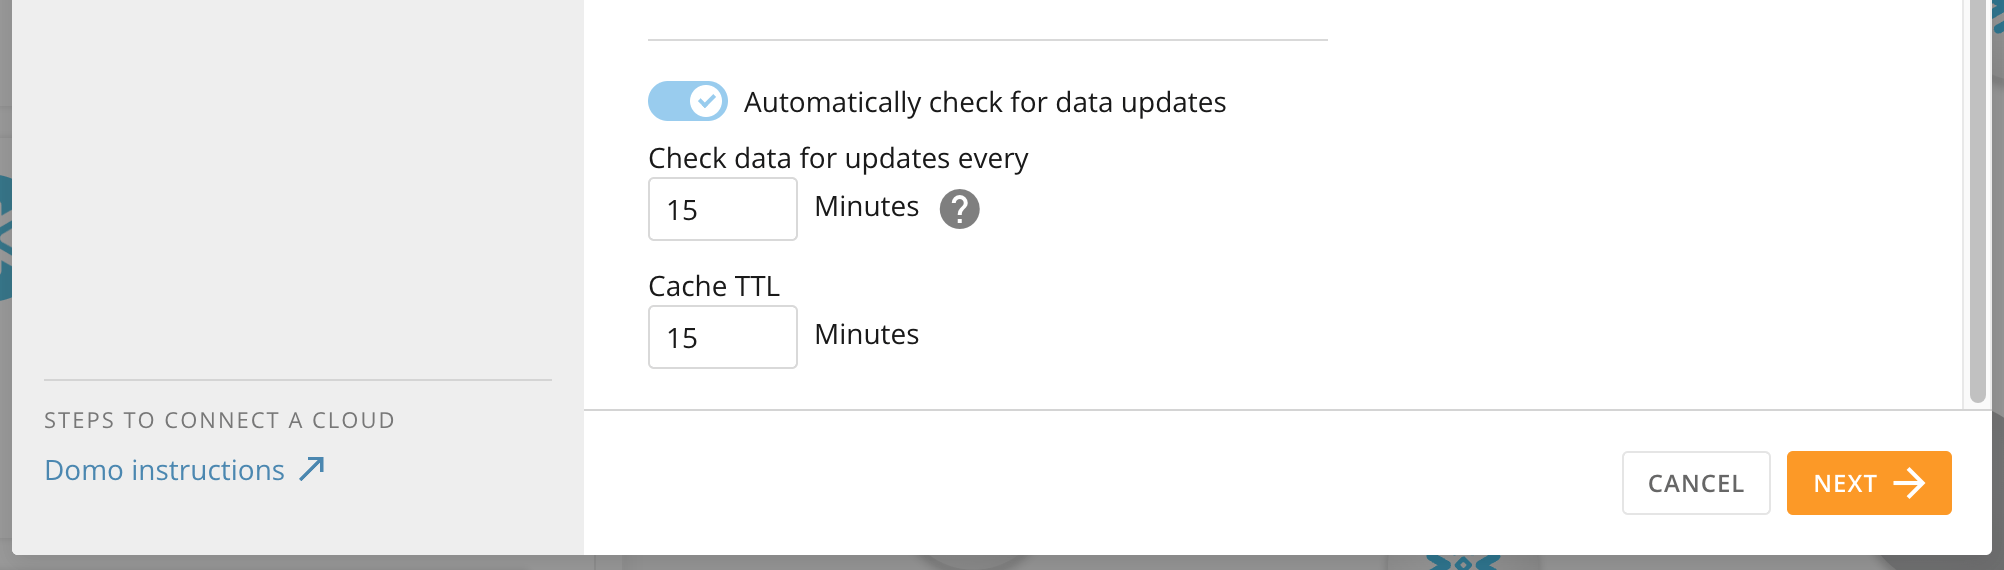
7. フォームの下部のキャッシュオプションを設定し、\*\*［次へ］\*\*を選択します。Cloud Integrationsのキャッシュのルールについては、[こちら](/ja/s/article/4412849158167)を参照してください。
   <Frame>
     <img src="https://mintcdn.com/domoinc-openapi-sync-dataflows/t8AZQgYc1CvVIAgR/images/kb/ja/0EMVq000000uWur.jpg?fit=max&auto=format&n=t8AZQgYc1CvVIAgR&q=85&s=2748477b2133ad59e0969690844074d8" alt="Screenshot 2024-05-07 at 3.24.52 PM.png" width="2004" height="570" data-path="images/kb/ja/0EMVq000000uWur.jpg" />
   </Frame>

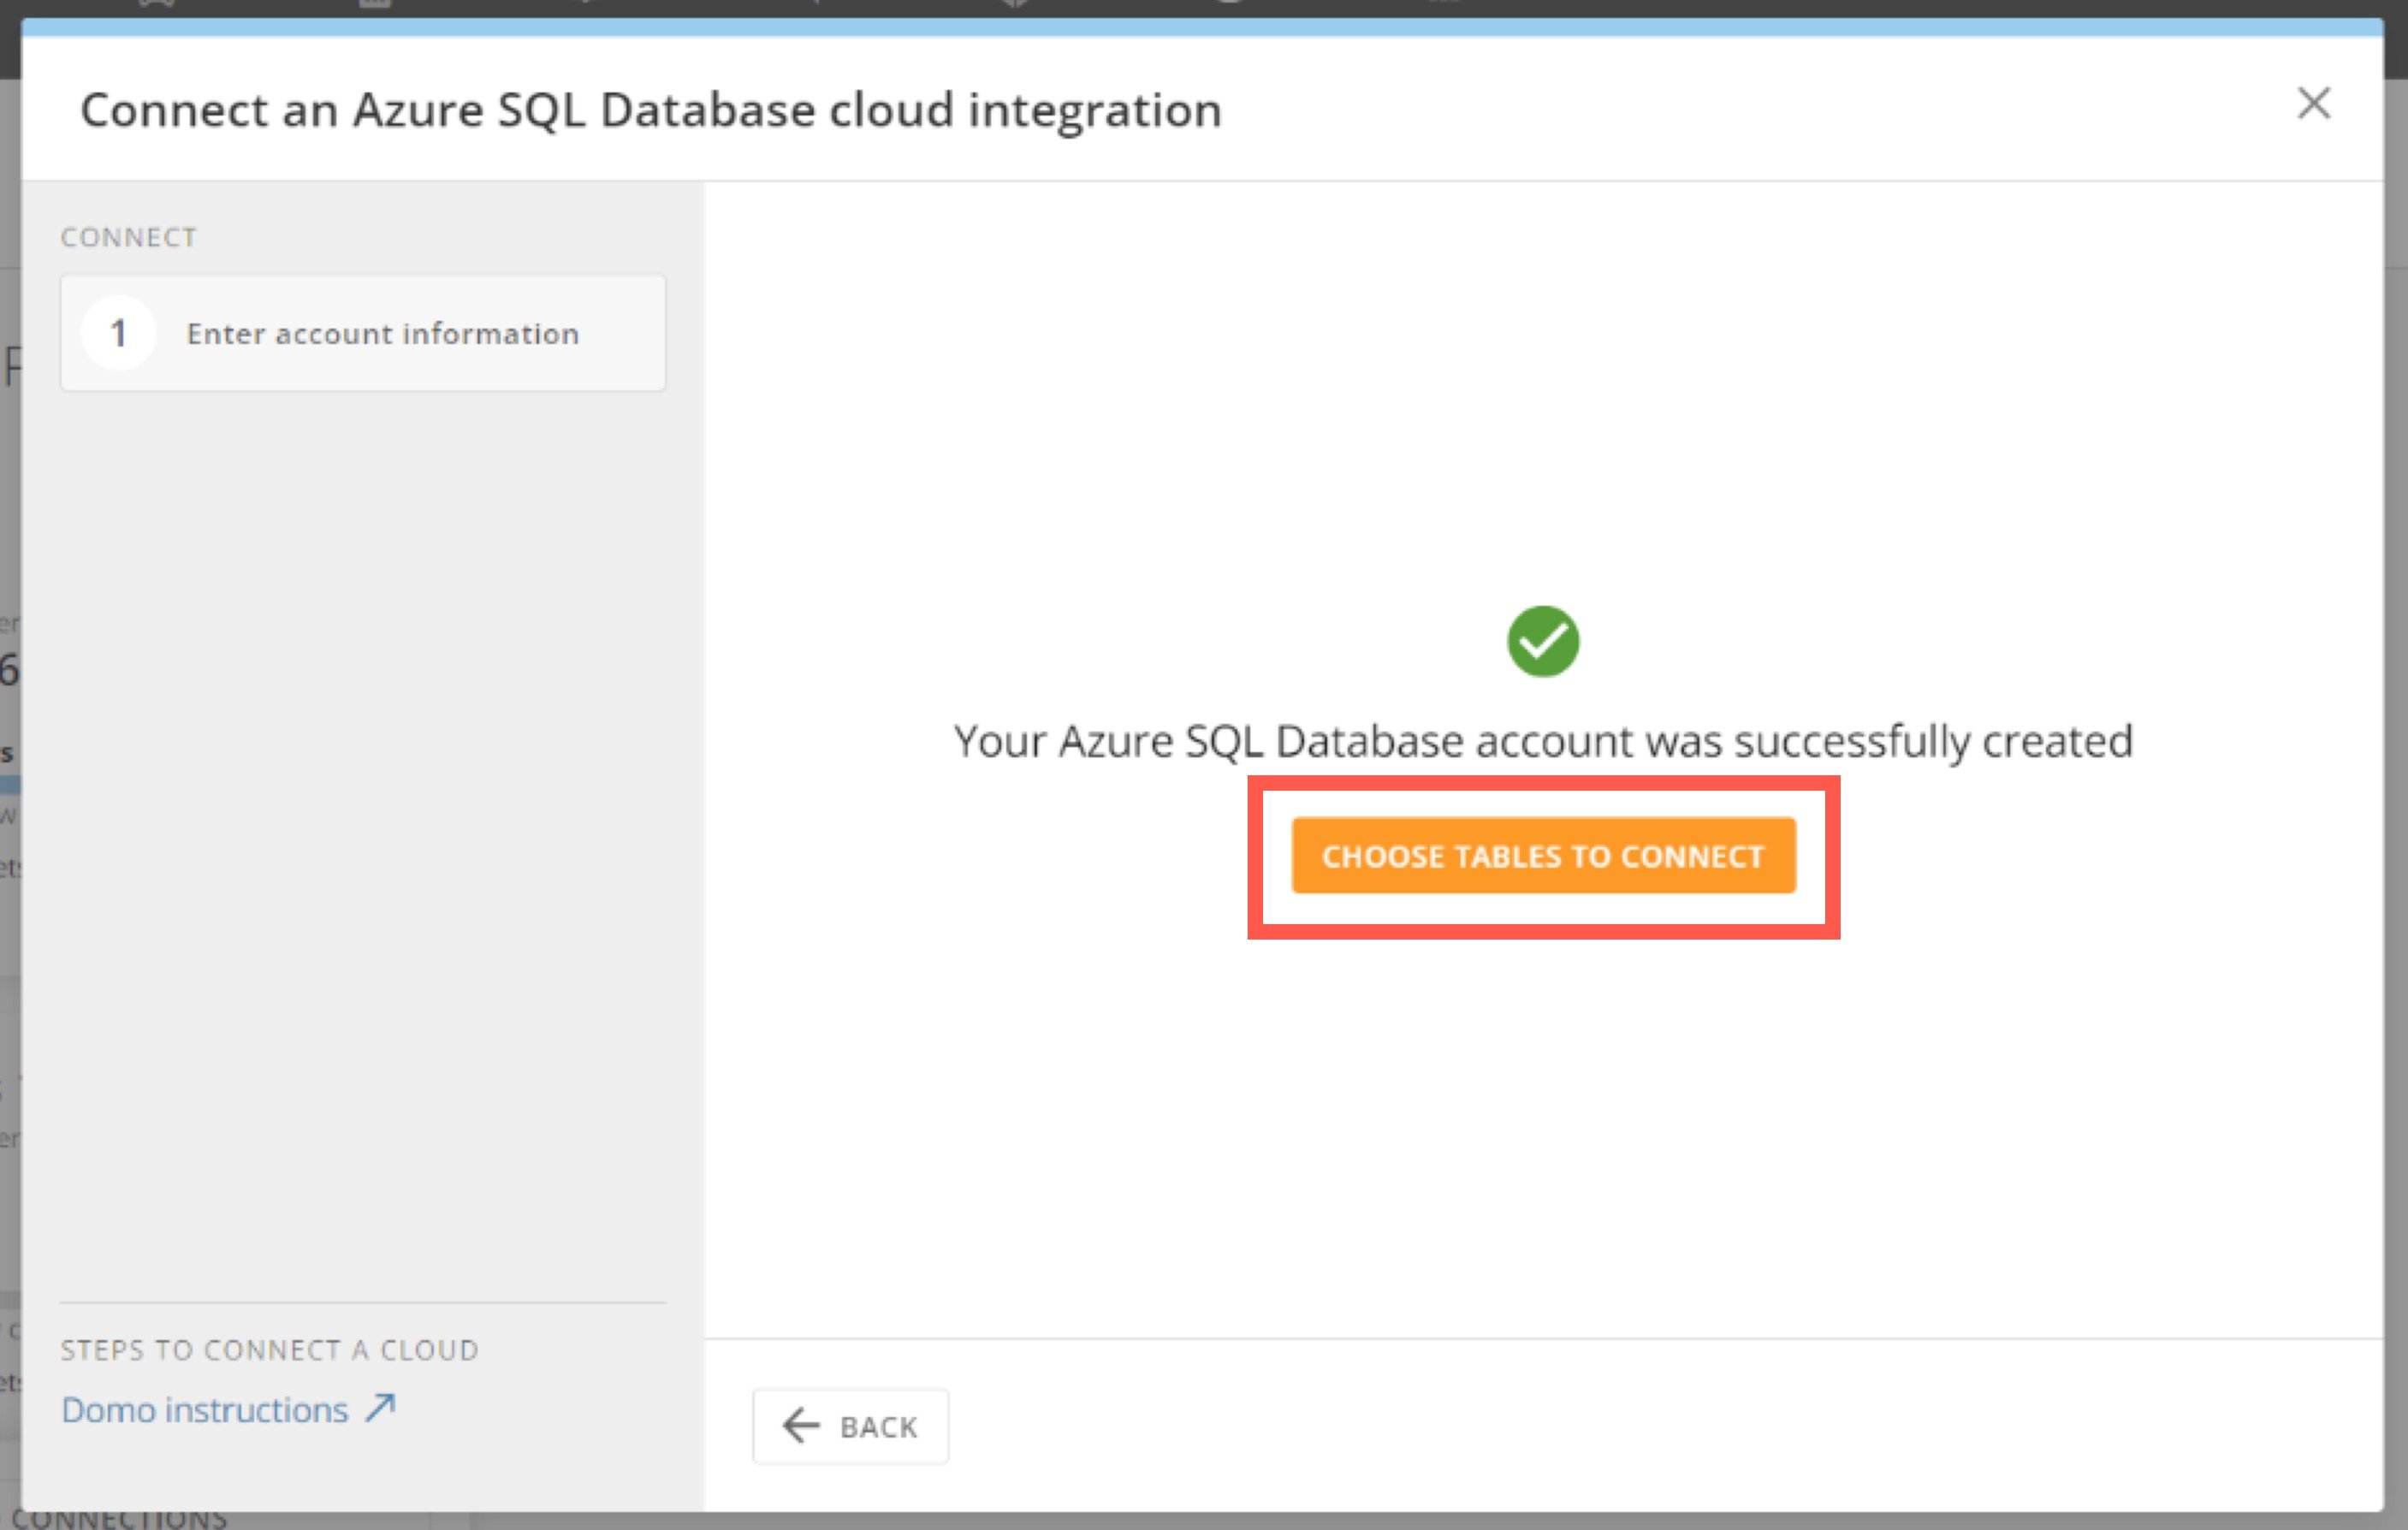
   成功メッセージが表示されます。

8. \*\*［Choose Tables to Connect］\*\*を選択して、テーブルピッカーを開きます。

   <Frame>
     <img src="https://mintcdn.com/domoinc-openapi-sync-dataflows/4lEEU32XA896xmLM/images/kb/ja/0EMVq000001K20H.jpg?fit=max&auto=format&n=4lEEU32XA896xmLM&q=85&s=bdd483d59de3ff23300d6a2aee76d8cf" alt="choose tables.jpg" width="2814" height="1788" data-path="images/kb/ja/0EMVq000001K20H.jpg" />
   </Frame>

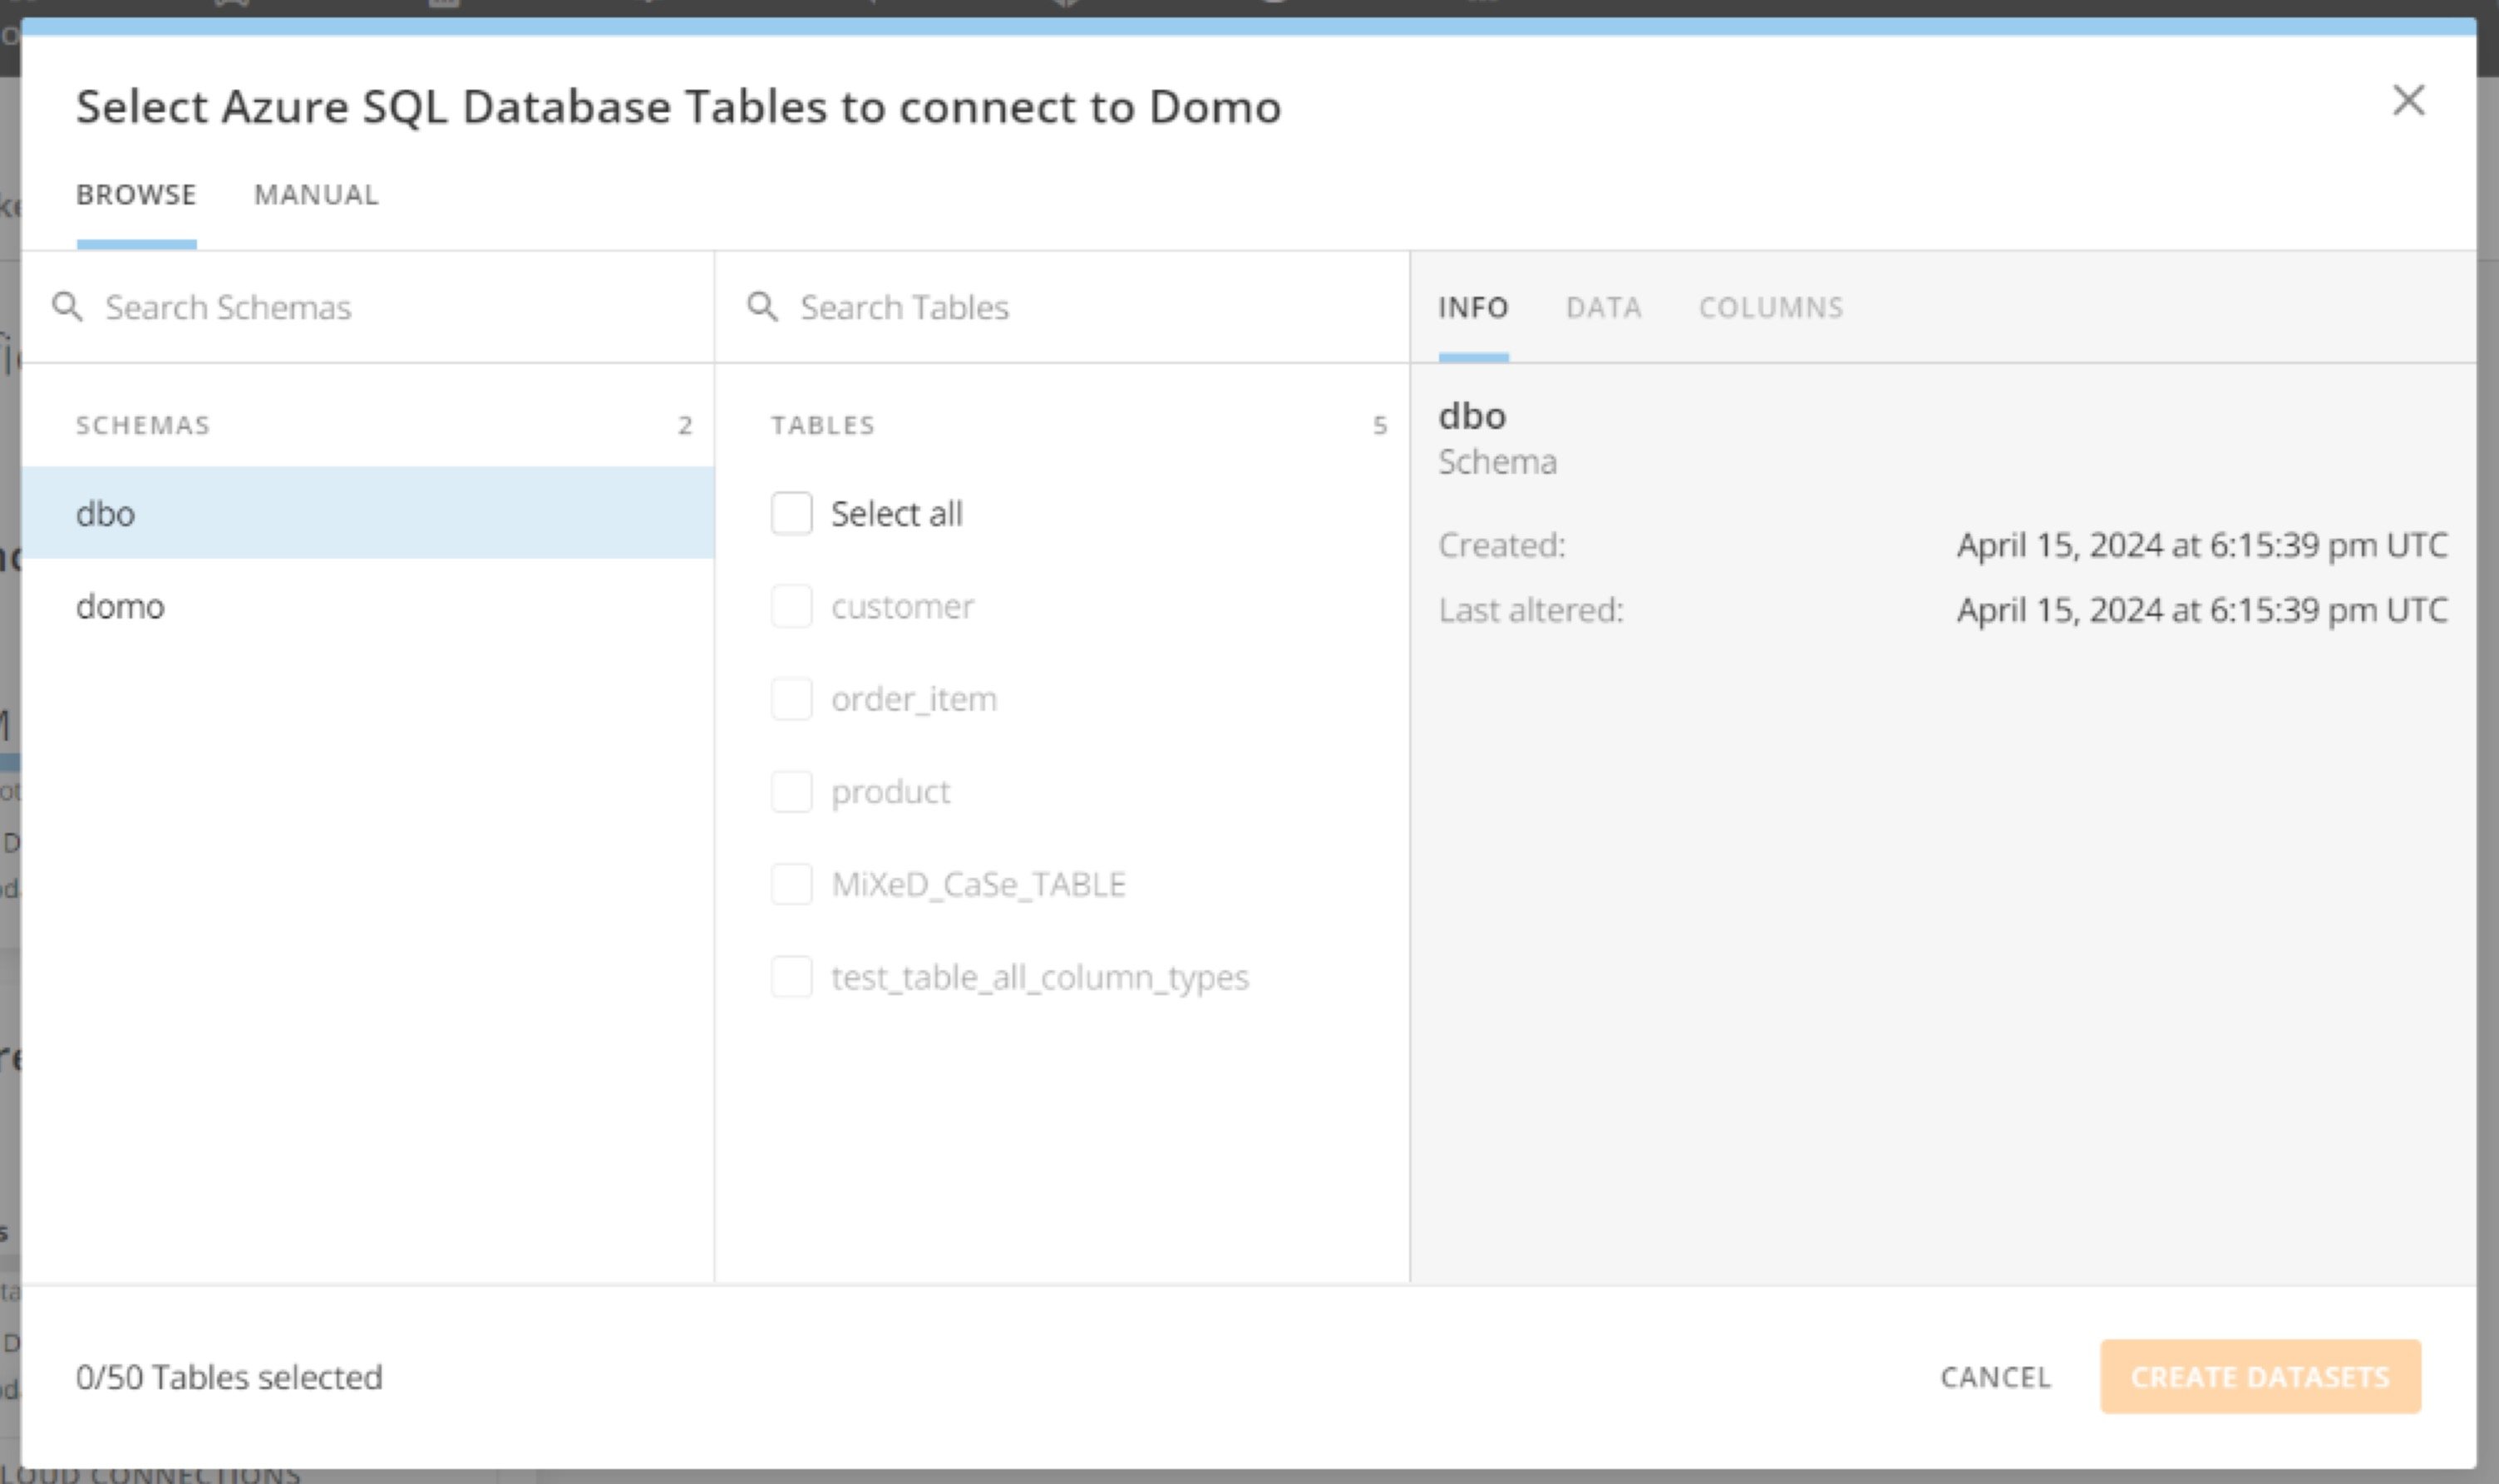
9. テーブルピッカーを使用して、スキーマとテーブルを選択します。準備ができたら、\*\*［DataSetを作成］\*\*を選択します。

   <Frame>
     <img src="https://mintcdn.com/domoinc-openapi-sync-dataflows/4lEEU32XA896xmLM/images/kb/ja/0EMVq000001L0hB.jpg?fit=max&auto=format&n=4lEEU32XA896xmLM&q=85&s=2c18964c471b6cbc2279d4d2cf0f5e93" alt="table picker.jpg" width="3006" height="1785" data-path="images/kb/ja/0EMVq000001L0hB.jpg" />
   </Frame>

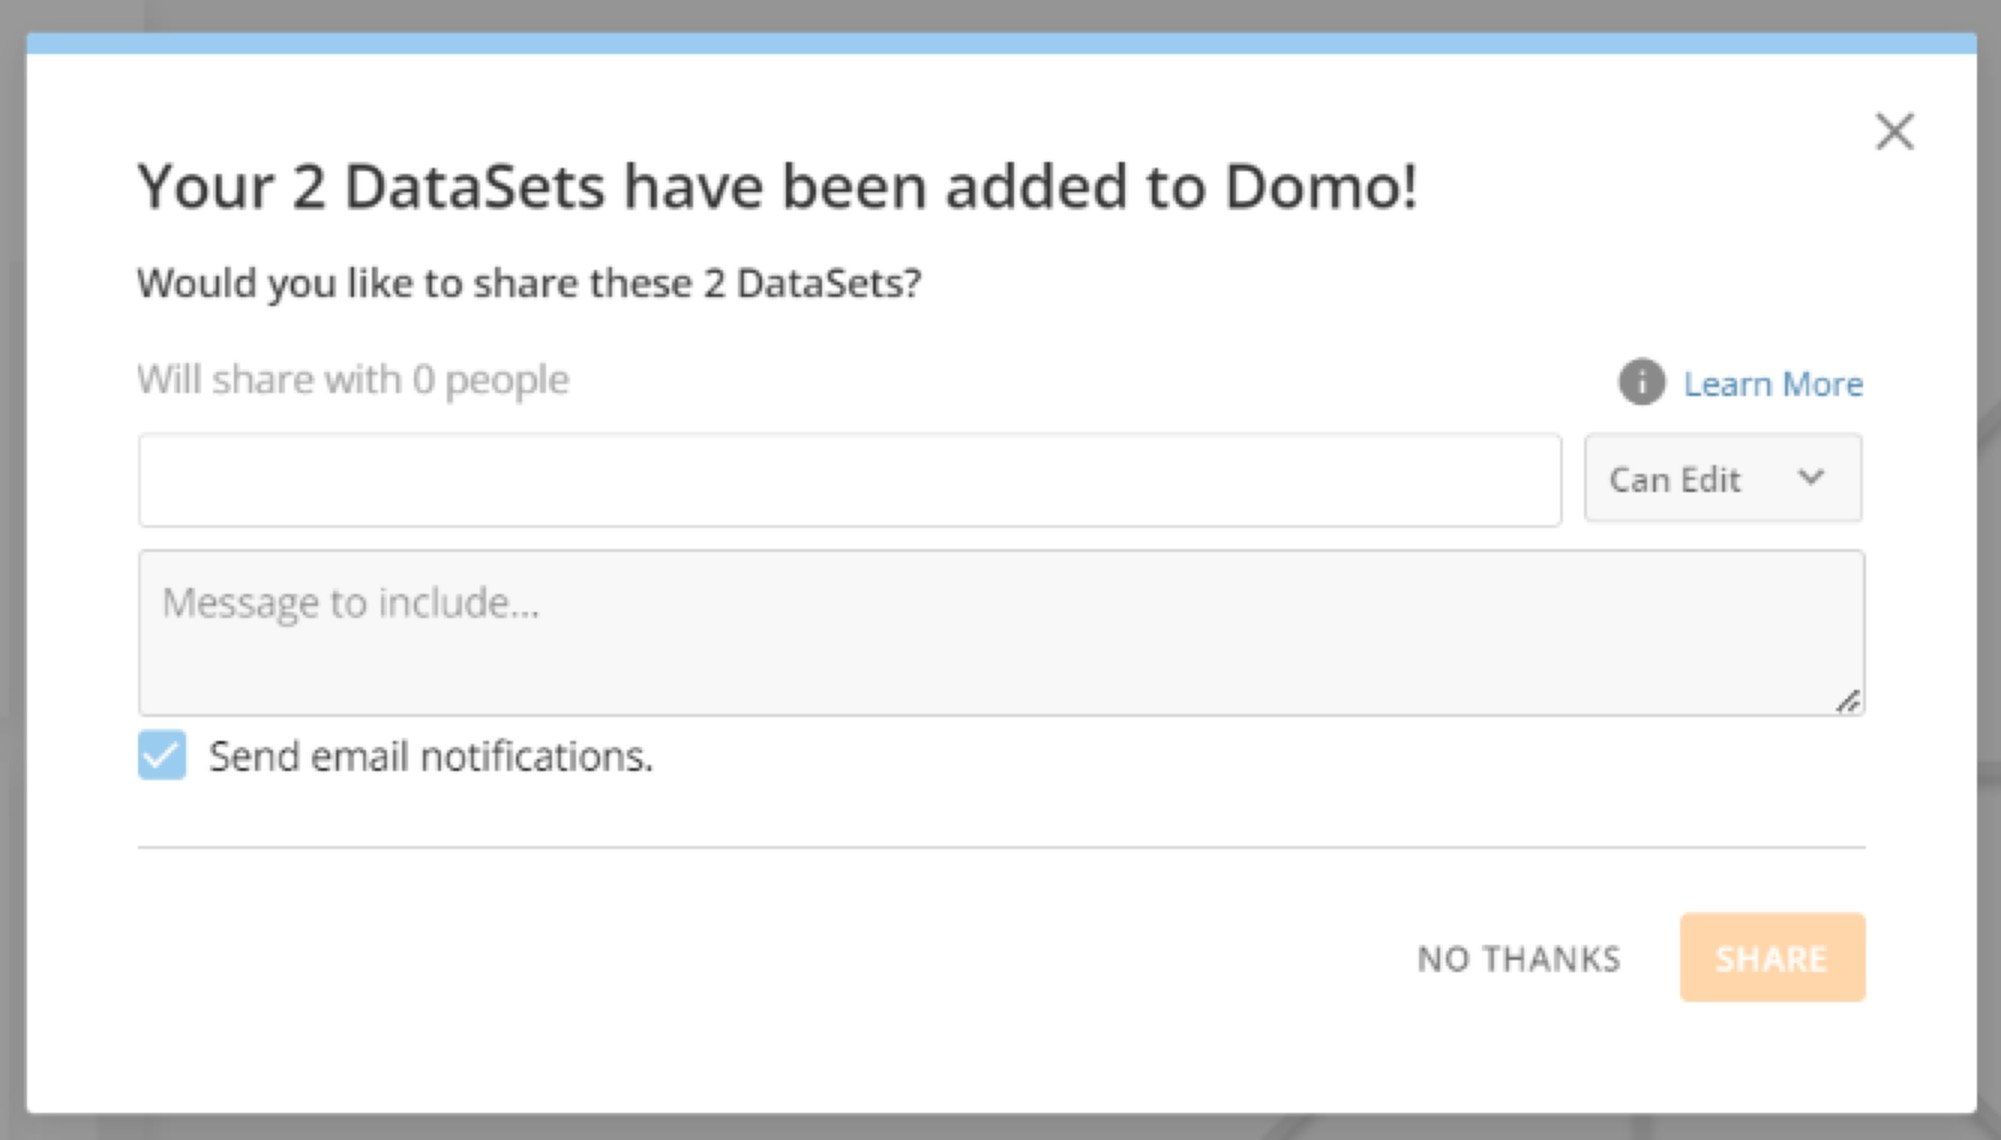
10. （オプション）確認モーダルでは、DataSetをほかのDomoユーザーとシェアできます。追加するユーザーを選択し、ドロップダウンでアクセスレベルを選択した後、\*\*［シェア］**を選択します。\
    または、**［今はやめておく］\*\*を選択し、アクセス権をシェアせずにモーダルを閉じます。

    <Frame>
      <img src="https://mintcdn.com/domoinc-openapi-sync-dataflows/t8AZQgYc1CvVIAgR/images/kb/ja/0EMVq000000uXZB.jpg?fit=max&auto=format&n=t8AZQgYc1CvVIAgR&q=85&s=95f235194aef796d7d2fb65dd0160570" alt="share modal.jpg" width="2001" height="1140" data-path="images/kb/ja/0EMVq000000uXZB.jpg" />
    </Frame>

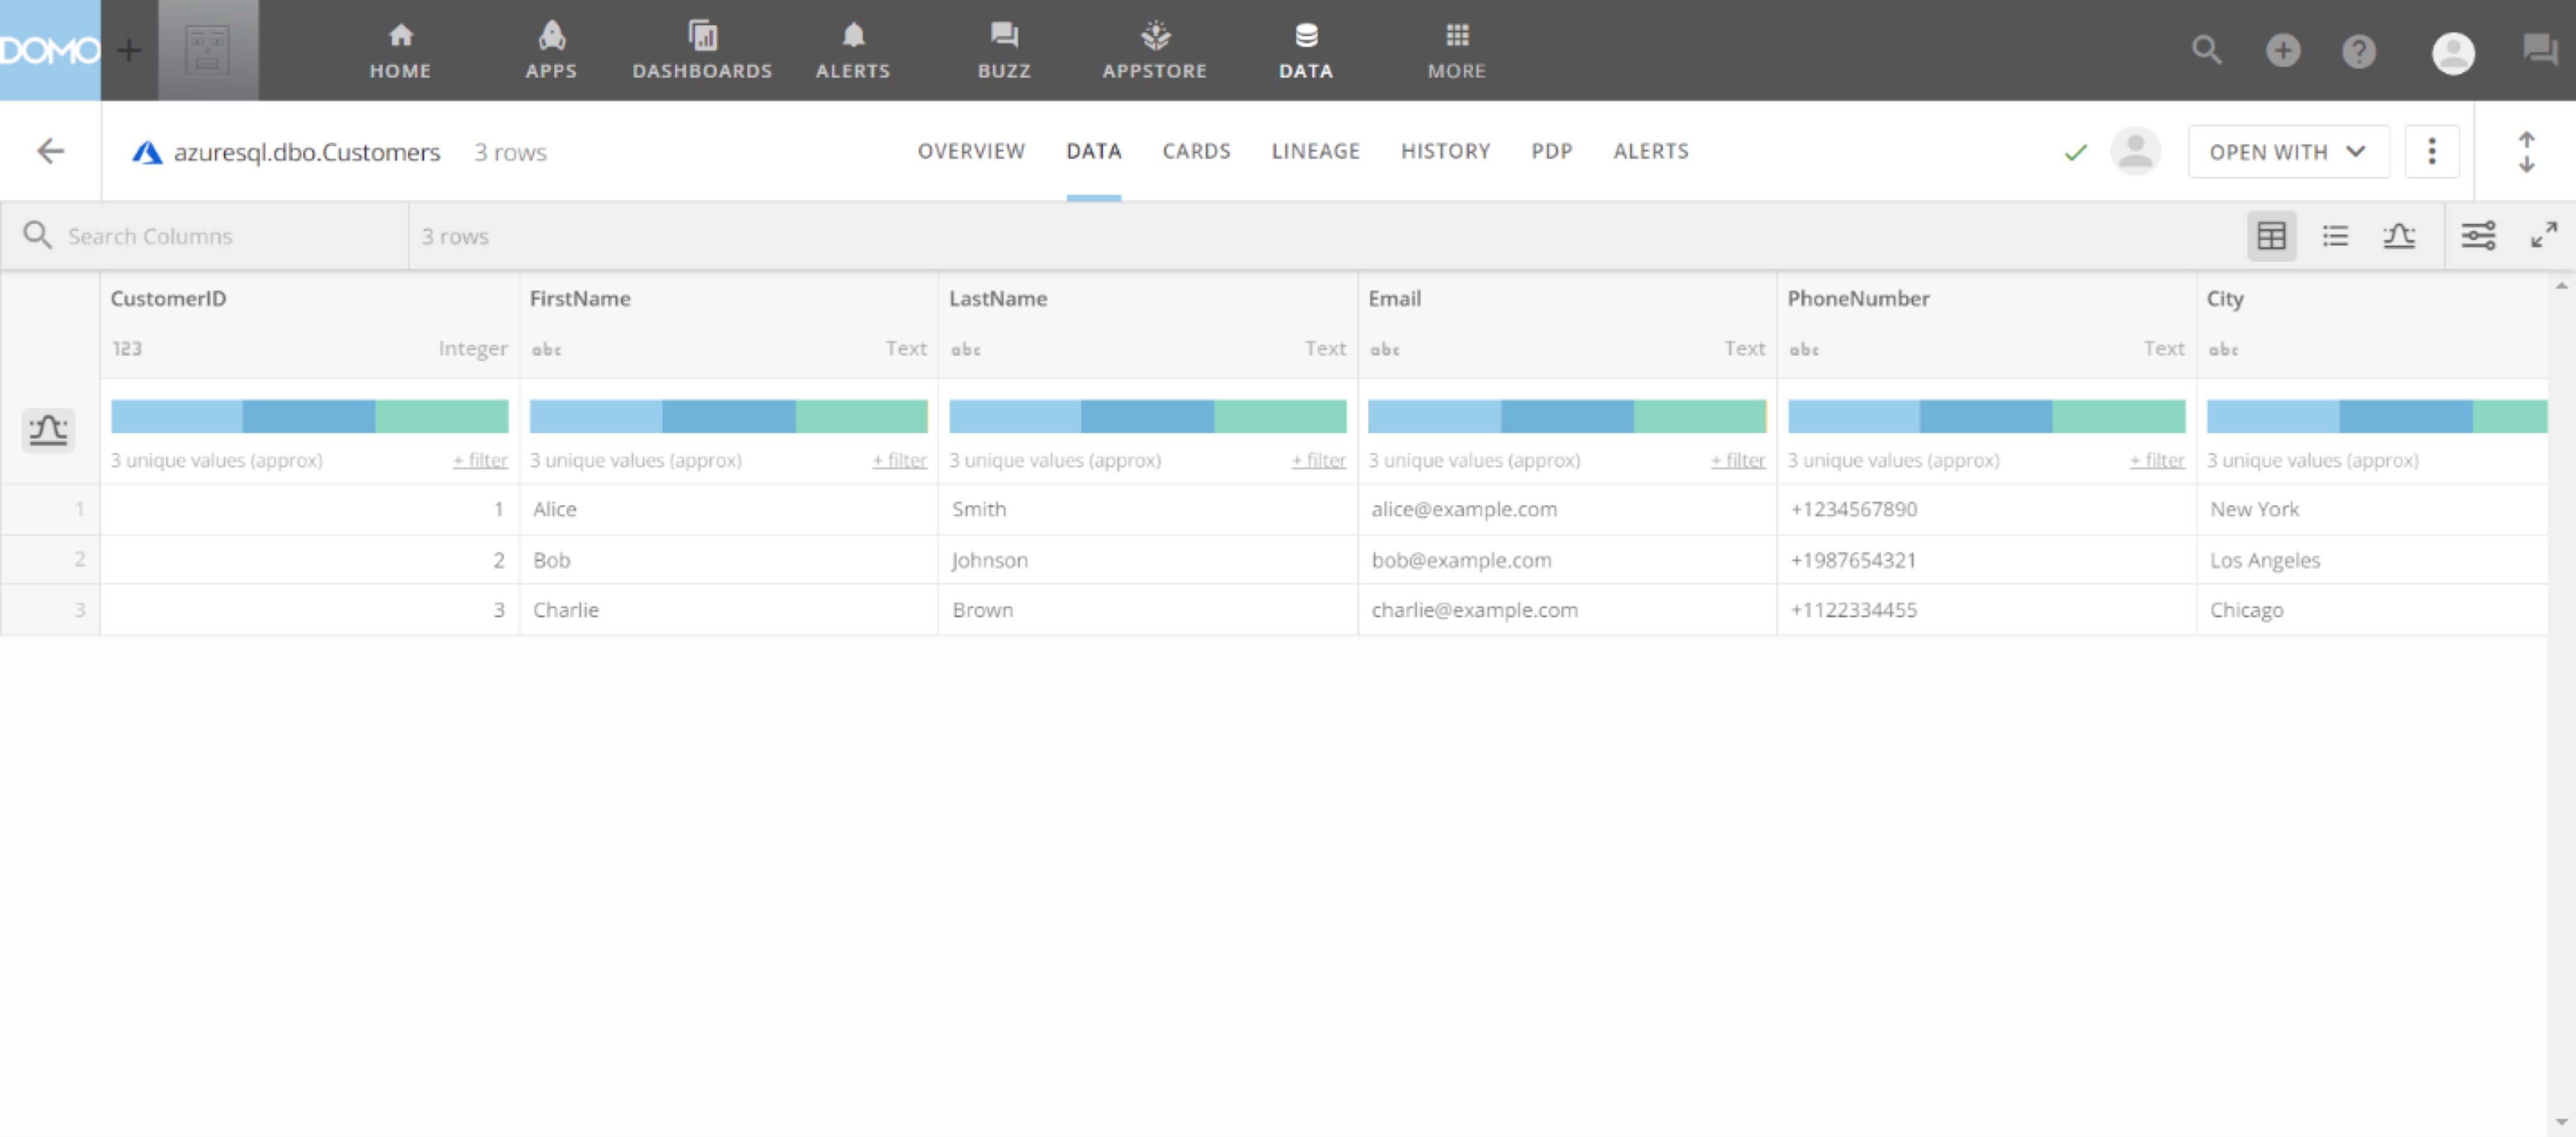
DomoでAzure SQL DataSetとやり取りできるようになりました。
<Frame>
  <img src="https://mintcdn.com/domoinc-openapi-sync-dataflows/4lEEU32XA896xmLM/images/kb/ja/0EMVq000001K2I1.jpg?fit=max&auto=format&n=4lEEU32XA896xmLM&q=85&s=de0cb2b5f3c146349cd0639f89909f5b" alt="interact with azure sql .jpg" width="4281" height="1890" data-path="images/kb/ja/0EMVq000001K2I1.jpg" />
</Frame>